安装Brizy时会出现缺失的安装
extension-xml/extension-zip/extension-curl
sudo apt-get install php7.4-xml
sudo apt-get install php7.4-zip
sudo apt-get install php7.4-curl安装Brizy时会出现缺失的安装
extension-xml/extension-zip/extension-curl
sudo apt-get install php7.4-xml
sudo apt-get install php7.4-zip
sudo apt-get install php7.4-curl.desktop文件[Desktop Entry]
Name=application_name
Exec=/xxx/xxx/xx.AppImage # 可执行文件,非root权限
Icon=/xxx/xxx/xxx.png #icon path
Type=Application
StartupNotify=true
.desktop添加可执行权限,并移动到/usr/share/applications/目录下。sudo chmod +x xxx.desktop
sudo mv xxx.desktop /usr/share/applications/
在我们修改某
.desktop图标后,发现并没有更新。这是因为系统对这些应用的图标进行了缓存,这时就需要刷新图标缓存。
sudo update-icon-cache /usr/share/icons/*p2p同步工具
https://www.jianshu.com/p/9e6289478bc8
首先需要获取最新版本的下载链接,打开官方 Github 项目的发布页。因为树莓派的 CPU 是 ARM 架构,所以我们需要文件名类似 syncthing-linux-arm-xxxxx.tar.gz 的下载链接,右键复制链接即可。笔者撰写文章时,链接为:https://github.com/syncthing/syncthing/releases/download/v0.14.49-rc.2/syncthing-linux-arm-v0.14.49-rc.2.tar.gz。
接下来通过 SSH 连接到树莓派,并获取文件,命令行如下:
cd ~
wget https://github.com/syncthing/syncthing/releases/download/v0.14.49-rc.2/syncthing-linux-arm-v0.14.49-rc.2.tar.gz
tar -zxvf syncthing-linux-arm-v0.14.49-rc.2.tar.gz
命令执行完成后,文件便下载解压完成了,为了便于操作,我们重命名下文件夹:
mv syncthing-linux-arm-v0.14.49-rc.2 syncthing
chmod +x ~/syncthing/syncthing
安装完成后,我们先运行一下:
~/syncthing/syncthing
这时会输出一些提示信息,我们可以等待两分钟让它自行初始化。
接着,我们开始修改配置文件以便局域网访问:
nano ~/.config/syncthing/config.xml
找到如下内容:
<gui enabled="true" tls="false">
<address>127.0.0.1:8384</address>
<apikey>XXXXXX</apikey>
</gui>
将 127.0.0.1:8384 修改为 0.0.0.0:8384,之后 ctrl+o 回车保存,ctrl+x 退出编辑。
这里参考了在树莓派上用 Syncthing 自建私有云盘的实现。
树莓派上执行命令:
sudo nano /etc/init.d/syncthing
粘贴如下内容:
#!/bin/sh
### BEGIN INIT INFO
# Provides:          Syncthing
# Required-Start:    $local_fs $remote_fs $network
# Required-Stop:     $local_fs $remote_fs $network
# Default-Start:     2 3 4 5
# Default-Stop:      0 1 6
# Short-Description: Syncthing
# Description:       Syncthing is for backups
### END INIT INFO

# Documentation available at
# http://refspecs.linuxfoundation.org/LSB_3.1.0/LSB-Core-generic/LSB-Core-generic/iniscrptfunc.html
# Debian provides some extra functions though
. /lib/lsb/init-functions

DAEMON_NAME="syncthing"
DAEMON_USER=pi
DAEMON_PATH="/home/pi/syncthing/syncthing"
DAEMON_OPTS=""
DAEMON_PWD="${PWD}"
DAEMON_DESC=$(get_lsb_header_val $0 "Short-Description")
DAEMON_PID="/var/run/${DAEMON_NAME}.pid"
DAEMON_NICE=0
DAEMON_LOG='/var/log/syncthing'

[ -r "/etc/default/${DAEMON_NAME}" ] && . "/etc/default/${DAEMON_NAME}"

do_start() {
  local result

    pidofproc -p "${DAEMON_PID}" "${DAEMON_PATH}" > /dev/null
    if [ $? -eq 0 ]; then
        log_warning_msg "${DAEMON_NAME} is already started"
        result=0
    else
        log_daemon_msg "Starting ${DAEMON_DESC}" "${DAEMON_NAME}"
        touch "${DAEMON_LOG}"
        chown $DAEMON_USER "${DAEMON_LOG}"
        chmod u+rw "${DAEMON_LOG}"
        if [ -z "${DAEMON_USER}" ]; then
            start-stop-daemon --start --quiet --oknodo --background \
                --nicelevel $DAEMON_NICE \
                --chdir "${DAEMON_PWD}" \
                --pidfile "${DAEMON_PID}" --make-pidfile \
                --exec "${DAEMON_PATH}" -- $DAEMON_OPTS
            result=$?
        else
            start-stop-daemon --start --quiet --oknodo --background \
                --nicelevel $DAEMON_NICE \
                --chdir "${DAEMON_PWD}" \
                --pidfile "${DAEMON_PID}" --make-pidfile \
                --chuid "${DAEMON_USER}" \
                --exec "${DAEMON_PATH}" -- $DAEMON_OPTS
            result=$?
        fi
        log_end_msg $result
    fi
    return $result
}

do_stop() {
    local result

    pidofproc -p "${DAEMON_PID}" "${DAEMON_PATH}" > /dev/null
    if [ $? -ne 0 ]; then
        log_warning_msg "${DAEMON_NAME} is not started"
        result=0
    else
        log_daemon_msg "Stopping ${DAEMON_DESC}" "${DAEMON_NAME}"
        killproc -p "${DAEMON_PID}" "${DAEMON_PATH}"
        result=$?
        log_end_msg $result
        rm "${DAEMON_PID}"
    fi
    return $result
}

do_restart() {
    local result
    do_stop
    result=$?
    if [ $result = 0 ]; then
        do_start
        result=$?
    fi
    return $result
}

do_status() {
    local result
    status_of_proc -p "${DAEMON_PID}" "${DAEMON_PATH}" "${DAEMON_NAME}"
    result=$?
    return $result
}

do_usage() {
    echo $"Usage: $0 {start | stop | restart | status}"
    exit 1
}

case "$1" in
start)   do_start;   exit $? ;;
stop)    do_stop;    exit $? ;;
restart) do_restart; exit $? ;;
status)  do_status;  exit $? ;;
*)       do_usage;   exit  1 ;;
esac
之后 ctrl+o 回车保存,ctrl+x 退出。执行命令:
#添加执行权限
sudo chmod +x /etc/init.d/syncthing
#添加自启启动
sudo update-rc.d syncthing defaults
现在还可以通过如下命令操作 syncthing:
sudo service syncthing start
sudo service syncthing stop
sudo service syncthing restart
sudo service syncthing status
树莓派上运行启动命令:
~/syncthing/syncthing
启动 syncthing 之后,打开 syncthing 的 web 图形界面,地址为:http://树莓派的IP地址:8384,我们可以通过 web 界面进行一些配置。
点击右上角「操作」,选择「设置」,点击第二个标签「图形用户界面」,填写「图形管理界面用户名」及「图形管理界面密码」,之后点击「保存」。
因为我的树莓派是在局域网中使用,所以我关闭了全球发现,打开设置的第三个标签「连接」,取消勾选「全球发现」。
接着为了实现备份的目的,开始配置文件夹,这里我把默认的文件夹移除了,新增了一个文件夹,点击主界面的「添加文件夹」,填入配置。
文件夹路径填写希望保存在树莓派的路径即可。
以上完成后,我们就可以开始进行手机端的配置啦。首先在手机上安装 syncthing 客户端。Syncthing 的 Android 客户端开源项目地址给出了在F-Droid的下载链接。
安装完成后,打开应用。初始化之后,同样删除默认文件夹,再点击右上角加号按钮新建一个。
填写完成后,点击右上角勾号保存。
打开树莓派的 syncthing 后台(http://树莓派ip:8384),点击主界面「添加远程设备」,填写设备 ID(在 Android 应用侧边栏显示设备 ID 选项)及设备名。之后打开 Android 应用,滑动侧边栏,打开「网页管理页面」,网页顶端会有个请求添加的提示,点击添加即可,如果没有就手动添加。
至此,就实现了树莓派和手机文件夹同步的功能,不论在手机上拍摄照片,或是修图删除图片,打开 syncthing Android 应用之后,就会自动上传改动到树莓派,保证了两端文件夹的一致。
如果需要实现即使手机上删除了照片,树莓派依旧有存档该如何实现呢?
首先,在 Android 应用中,点击文件夹,勾选「仅发送」。
之后,打开树莓派 web 后台,点击右上角「操作」,选择「高级」,点开「文件夹”xxx”」,勾选「Ignore Delete」即可。
Nuitka:Python 打包工具
直接利用pip即可安装:pip install Nuitka
nuitka3 --standalone --show-memory --show-progress --nofollow-imports --plugin-enable=qt-plugins --follow-import-to=utils,src --output-dir=out --windows-icon-from-ico=./logo.ico demo.pyMac os下安装nuitka
#出错时ModuleNotFoundError: No module named '_tkinter'
brew install [email protected][Ubuntu下出错ModuleNotFoundError: No module named 'tkinter'的解决]
sudo apt-get install tcl-dev tk-dev python3-tk安装nuitka
pip install -U nuitkaxcodebuild -runFirstLaunchnuitka3 --run gendomain.py#ModuleNotFoundError: No module named 'lxml'
pip install lxml nuitka3 --standalone --macos-create-app-bundle gendomain.py
生成程序后从目录中拷贝到需要的位置并将其加入到访达的应用程序中https://www.cnblogs.com/mrzzoxo/p/15145153.html
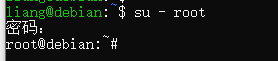
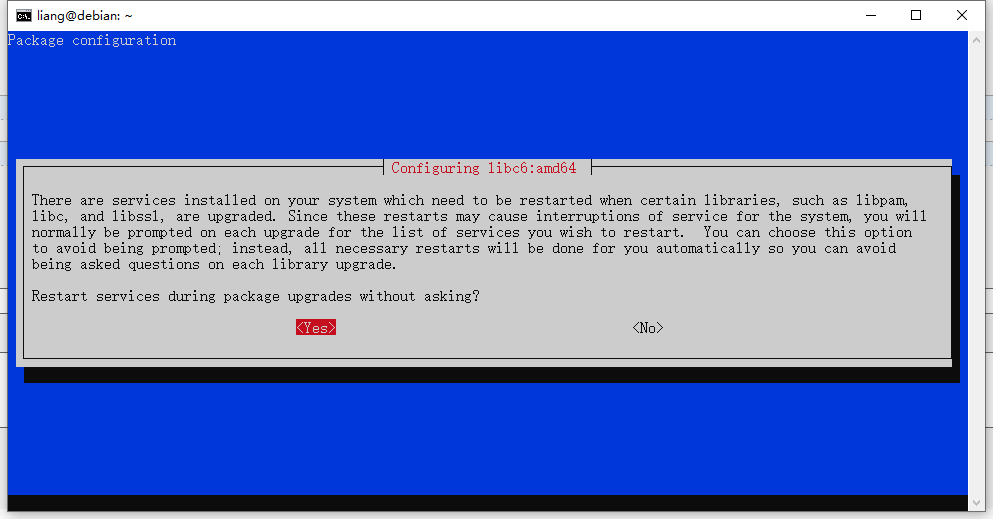
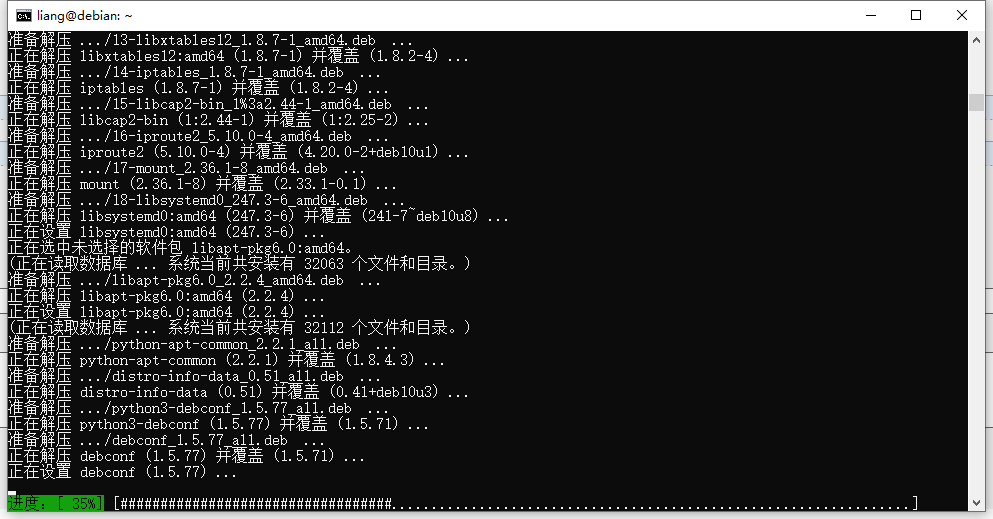
su - root切换root用户,环境变量(root登录的,可以跳过)

image

2、apt update && apt upgrade 更新下当前系统和软件包

3、nano /etc/apt/sources.list 修改bullseye仓库名

image

或者直接清空原配置,复制下面的粘贴进去(这里用的清华源)

# 默认注释了源码镜像以提高 apt update 速度,如有需要可自行取消注释
deb https://mirrors.tuna.tsinghua.edu.cn/debian/ bullseye main contrib non-free
# deb-src https://mirrors.tuna.tsinghua.edu.cn/debian/ bullseye main contrib non-free
deb https://mirrors.tuna.tsinghua.edu.cn/debian/ bullseye-updates main contrib non-free
# deb-src https://mirrors.tuna.tsinghua.edu.cn/debian/ bullseye-updates main contrib non-free

deb https://mirrors.tuna.tsinghua.edu.cn/debian/ bullseye-backports main contrib non-free
# deb-src https://mirrors.tuna.tsinghua.edu.cn/debian/ bullseye-backports main contrib non-free

deb https://mirrors.tuna.tsinghua.edu.cn/debian-security bullseye-security main contrib non-free
# deb-src https://mirrors.tuna.tsinghua.edu.cn/debian-security bullseye-security main contrib non-free
4、修改完成 Ctrl O保存,Ctrl X退出

5、接下来就可以进行升级了,apt update && apt upgrade ,输入Y继续

image

6、弹出更新日志,输入q退出(当然你想看的话,可以慢慢看)

image

7、升级过程中不询问就重新启动服务,选择Yes

image

8、接下来开始升级了(大概几分钟左右跑完)然后重启系统

image

9、重新登录系统,输入cat /etc/debian_version && uname --all 可以看到已经成功升级到Debian11

image
su - root切换root用户,环境变量(root登录的,可以跳过)
2、apt update && apt upgrade 更新下当前系统和软件包
3、nano /etc/apt/sources.list 修改bullseye仓库名
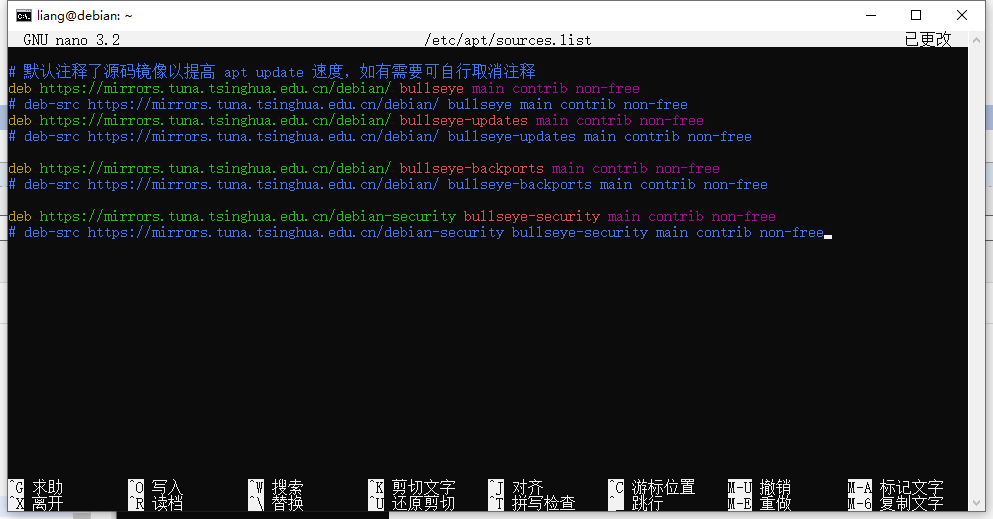
或者直接清空原配置,复制下面的粘贴进去(这里用的清华源)
# 默认注释了源码镜像以提高 apt update 速度,如有需要可自行取消注释deb https://mirrors.tuna.tsinghua.edu.cn/debian/ bullseye main contrib non-free# deb-src https://mirrors.tuna.tsinghua.edu.cn/debian/ bullseye main contrib non-freedeb https://mirrors.tuna.tsinghua.edu.cn/debian/ bullseye-updates main contrib non-free# deb-src https://mirrors.tuna.tsinghua.edu.cn/debian/ bullseye-updates main contrib non-free deb https://mirrors.tuna.tsinghua.edu.cn/debian/ bullseye-backports main contrib non-free# deb-src https://mirrors.tuna.tsinghua.edu.cn/debian/ bullseye-backports main contrib non-free deb https://mirrors.tuna.tsinghua.edu.cn/debian-security bullseye-security main contrib non-free# deb-src https://mirrors.tuna.tsinghua.edu.cn/debian-security bullseye-security main contrib non-free4、修改完成 Ctrl O保存,Ctrl X退出
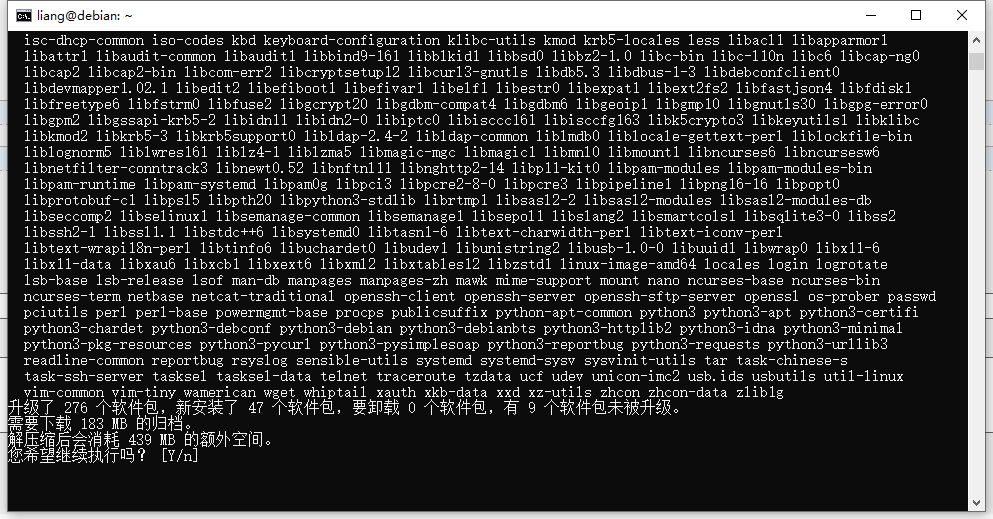
5、接下来就可以进行升级了,apt update && apt upgrade ,输入Y继续
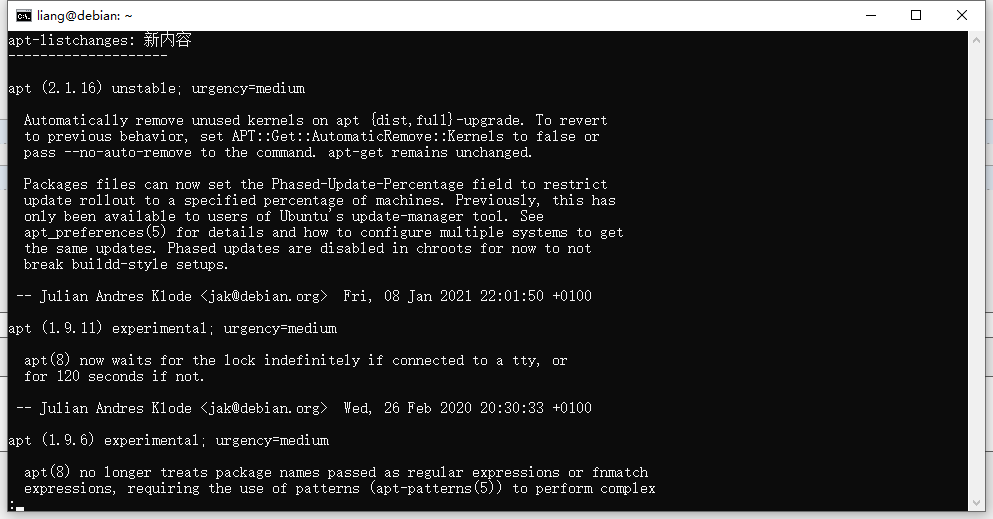
6、弹出更新日志,输入q退出(当然你想看的话,可以慢慢看)
7、升级过程中不询问就重新启动服务,选择Yes
8、接下来开始升级了(大概几分钟左右跑完)然后重启系统
9、重新登录系统,输入cat /etc/debian_version && uname --all 可以看到已经成功升级到Debian11

目前使用版本
需按提示拷贝config.json文件到指定目录
config.json样本
{
"$schema": "https://ddns.newfuture.cc/schema/v2.8.json",
"debug": false,
"dns": "alidns",
"id": "LTAI5tJZD",
"index4": "default",
"index6": "default",
"ipv4": [],
"ipv6": [
"nestpi.com",
"www.nestpi.com"
],
"proxy": null,
"token": "ZOGsWrjhw33",
"ttl": null
}
sudo python run.py
sudo bash systemd.sh install
sudo bash task.sh
未验证版本
for windows
import subprocess
import json


def generate_curl_command(conf, page):
    """
    Generate command to invoke "curl" for Cloudflare API communication.
    """

    pattern = """\
curl -X GET "https://api.cloudflare.com/client/v4/zones/%s/dns_records?page=%d" \
-H "X-Auth-Email:%s" -H "X-Auth-Key:%s" -H "Content-Type: application/json" \
"""
    command = pattern % (conf["zone_id"], page, conf["email"], conf["api_key"])

    return command


def load_user_config_file():
    """
    Load user configuration file in order to use Cloudflare API.
    """

    with open("config.json") as file:
        conf = json.load(file)

    if conf["proxied"]:
        conf["proxied"] = "true"
    else:
        conf["proxied"] = "false"

    return conf


def invoke_curl_command(command):
    """
    Invoke "curl" to use Cloudflare API to update DNS record.
    """

    curl_subp = subprocess.Popen(command, shell=True, stdout=subprocess.PIPE, stderr=subprocess.PIPE)
    stdout, _ = curl_subp.communicate()
    curl_subp.wait()
    curl_response = json.loads(stdout)

    return curl_response


def print_error_message(response):
    """
    Print human friendly error message.
    """

    print("Error occured when communicating to Cloudflare API.")
    print("The API returned the message below:")
    for error in response["errors"]:
        error_message = error["message"]
        print(error_message)


def find_record_id(page_num, conf):
    """
    Search through all pages to find desired record id.
    """

    dns_name = conf["name"]
    found = False
    record_id = None

    for i in range(page_num):
        curl_cmd = generate_curl_command(conf, i + 1)
        response = invoke_curl_command(curl_cmd)
        for entry in response["result"]:
            if entry["name"] == dns_name and entry["type"] == "AAAA":
                found = True
                record_id = entry["id"]
                break
        if found:
            break

    return record_id


def main():
    conf = load_user_config_file()

    dns_name = conf["name"]

    curl_cmd = generate_curl_command(conf, 1)
    response = invoke_curl_command(curl_cmd)

    if not response["success"]:
        print_error_message(response)
        exit(1)

    page_num = response["result_info"]["total_pages"]

    record_id = find_record_id(page_num, conf)

    if record_id is None:
        print("No DNS record of type AAAA is found given the name %s" % dns_name)
    else:
        print("Record id of name \"%s\" is: %s" % (dns_name, record_id))


if __name__ == "__main__":
    main()
下面的代码经过验证
#经验证代码
import time
import re
import requests
import pydnspod
import socket
import os

global old_ip

def get_local_ipv6():
    string = os.popen("ifconfig")
    ip = list(string)
    ip_str = str(ip)
    comp = re.compile("24[0-9a-f]*:[0-9a-f]*:[0-9a-f]*:[0-9a-f]*:[0-9a-f]*:[0-9a-f]*:[0-9a-f]*:[0-9a-f]*")
    ans = comp.findall(ip_str)
    return ans[0]

user_id = "189498"#更换成你的Token ID
user_token = "e0a8e5b1b2f1d0d88f7d3a9e9a7e07f4"#更换成你的Token
domain = "carbin.press"#更换成你的域名
sub_domain = "@"#更换成你的记录
sub_domain_id = "683917156"#更换成你的记录ID
sub_domain1 = "www"
sub_domain_id1="688381119"
dp = pydnspod.connect(user_id,user_token)

old_ip=bytes(dp.record.info(domain,sub_domain_id)['value'],encoding='utf8')


while(True):
    try:
#        old_ip=str("b'"+dp.record.info(domain,sub_domain_id)['value']+"'")
        sock = socket.create_connection(('ns1.dnspod.net',6666),20)
        ipv4 = sock.recv(16)
        time.sleep(5)

        if old_ip != ipv4:
            print("当前记录:"+bytes.decode(old_ip))
            print("公网ip:"+bytes.decode(ipv4))
            time.sleep(2)
            return_ = dp.record.modify(domain,sub_domain_id,sub_domain,"A",ipv4)
            return_1= dp.record.modify(domain,sub_domain_id1,sub_domain1,"A",ipv4)
            old_ip=bytes(dp.record.info(domain,sub_domain_id)['value'],encoding='utf8')
            print(return_)
            print(return_1)
            if (return_ == None or return_1 == None):
                print("未更新")
                time.sleep(2)
            else:
                print("已更新,等待300秒")
                time.sleep(300)

    except IndexError:
        print("网络未连接")
        time.sleep(2)
    except OSError:
        print("网络中断")
        time.sleep(2)