一键备份
建立文件backup.sh
sudo nano backup.sh
#!/bin/bash
set -e #当命令以非零状态退出时,则退出shell
Color_End="\033[0m"
Color_Red="\033[31m"
Color_Green="\033[32m"
if [ `id -un` != "root" ];then
    echo -e "$Color_Red权限不足,退出脚本! $Color_End"
    exit 1
fi
# 设置文件存放目录
BACKUP_DIR=`pwd`
BACK_UP_DIR=$BACKUP_DIR/raspi-backup
FILE=$BACK_UP_DIR/raspi-backup.img  #备份后的img文件名
mkdir $BACK_UP_DIR
#安装必要的软件安装包
echo -e "$Color_Green安装必要的软件...$Color_End"
apt-get install -qq -y dosfstools dump parted kpartx rsync
apt-get clean
#创建镜像img文件
echo -e "$Color_Green创建img文件...$Color_End"
ROOT=`df -P | grep /dev/root | awk '{print $3}'`   #获取 ROOT的文件大小
MMCBLK0P1=`df -P | grep /dev/mmcblk0p1 | awk '{print $2}'`  #获取主目录的文件大小
ALL=`echo $ROOT $MMCBLK0P1 | awk '{print int(($1+$2)*1.1)}'`  #生成一个比原文件大200M的IMG文件
echo "预计生成文件大小:$(($ALL/1024))MB"
echo "root 大小是 $(($ROOT/1024))MB"
echo "boot 大小是 $(($MMCBLK0P1/1024))MB"
echo "文件路径是 $FILE"
dd if=/dev/zero of=$FILE bs=1K count=$ALL status=progress
#格式化分区
echo -e "$Color_Green格式化root和boot...$Color_End"
P1_START=`fdisk -l /dev/mmcblk0 | grep /dev/mmcblk0p1 | awk '{print $2}'`
P1_END=`fdisk -l /dev/mmcblk0 | grep /dev/mmcblk0p1 | awk '{print $3}'`
P2_START=`fdisk -l /dev/mmcblk0 | grep /dev/mmcblk0p2 | awk '{print $2}'`
echo "boot_start is :$P1_START .boot_end is : $P1_END  .rootfs_start is :$P2_START"
parted $FILE --script -- mklabel msdos
parted $FILE --script -- mkpart primary fat32 ${P1_START}s ${P1_END}s
parted $FILE --script -- mkpart primary ext4 ${P2_START}s -1
parted $FILE --script -- quit
# mount
echo -e "$Color_Green挂载分区...$Color_End"
loopdevice_dst=`losetup -f --show $FILE`
echo "loop分区在 $loopdevice_dst"
PART_BOOT="/dev/dm-0"
PART_ROOT="/dev/dm-1"
sleep 1
device_dst=`kpartx -va $loopdevice_dst | sed -E 's/.*(loop[0-9])p.*/\1/g' | head -1`
sleep 1
device_dst="/dev/mapper/${device_dst}"
sleep 1
mkfs.vfat ${device_dst}p1 -n boot
sleep 1
mkfs.ext4 ${device_dst}p2 -L rootfs
sleep 1
# 复制文件到img
echo -e "$Color_Green复制文件到img...$Color_End"
echo "备份分区 /dev/boot"
dst_boot_path=$BACK_UP_DIR/dst_boot
mkdir  $dst_boot_path
mount -t vfat ${device_dst}p1 $dst_boot_path
cp -rfp /boot/* $dst_boot_path
echo "备份boot完成"
echo "备份分区 /dev/root"
dst_root_path=$BACK_UP_DIR/dst_root
mkdir  $dst_root_path
sleep 1
mount -t ext4 ${device_dst}p2 $dst_root_path
cd $dst_root_path
chmod 777 $dst_root_path/
#通过rsync复制根目录文件到IMG镜像中,排除了一些不需要同步的文件
rsync -ax --info=progress2 --no-inc-recursive \
    --exclude="$FILE" \
    --exclude=$BACK_UP_DIR  \
    --exclude=$BACKUP_DIR/$0  \
    --exclude=/sys/* \
    --exclude=/proc/*  \
    --exclude=/tmp/* /  $dst_root_path/
echo "备份root完成"
# 设置自动扩展空间
echo -e "$Color_Green设置自动扩展空间 ...$Color_End"
sed -i 's/exit 0/sudo bash \/expand-rootfs.sh \&/' $dst_root_path/etc/rc.local
echo "exit 0" >> $dst_root_path/etc/rc.local
cat > $dst_root_path/expand-rootfs.sh << EOF
#!/bin/bash
sed -i '/sudo bash \/expand-rootfs.sh &/d' /etc/rc.local
rm "\`pwd\`/\$0"
echo -e "\033[33m两秒后扩展分区空间!\033[0m"
sleep 2
raspi-config --expand-rootfs
echo -e "\033[33my一秒后重启系统!\033[0m"
sleep 1
reboot
EOF
#返回目录 $BACKUP_DIR
cd $BACKUP_DIR
sync
#替换PARTUUID 这步非常重要,liunx启动时会对PARTUUID有特定的指定,备份的时候是把旧的也同步过来,需要根据新的IMG文件来更新PARTUUID
echo -e "$Color_Green替换PARTUUID ...$Color_End"
opartuuidb=`blkid -o export /dev/mmcblk0p1 | grep PARTUUID`
opartuuidr=`blkid -o export /dev/mmcblk0p2| grep PARTUUID`
npartuuidb=`blkid -o export ${device_dst}p1 | grep PARTUUID`
npartuuidr=`blkid -o export ${device_dst}p2 | grep PARTUUID`
echo "BOOT uuid $opartuuidb 替换为 $npartuuidb"
echo "ROOT uuid $opartuuidr 替换为 $npartuuidr"
sed -i "s/$opartuuidr/$npartuuidr/g" $dst_boot_path/cmdline.txt
sed -i "s/$opartuuidb/$npartuuidb/g" $dst_root_path/etc/fstab
sed -i "s/$opartuuidr/$npartuuidr/g" $dst_root_path/etc/fstab
#清理释放装载的文件夹
echo -e "$Color_Green清理释放装载的文件夹...$Color_End"
umount $dst_boot_path
umount $dst_root_path
kpartx -d ${device_dst}p1
kpartx -d ${device_dst}p2
kpartx -d $loopdevice_dst
losetup -d $loopdevice_dst
rm -rf  $dst_boot_path
rm -rf  $dst_root_path
chmod 766 $FILE
mv $FILE $BACKUP_DIR
rm -rf $BACK_UP_DIR
echo -e "$Color_Green备份完成。$Color_End"
exit 0
给文件权限并执行
chmod +x backup.sh
sudo bash backup.sh
执行后将在当前路径生成备份文件:raspi-backup.img
参考链接:https://github.com/mghcool/Raspberry-backup
另一种方案(未验证)
https://github.com/nanhantianyi/rpi-backup
处理大文件无法拷贝传输问题
磁盘需要格式化为exFAT32格式,其它格式未验证,但fat32对于超过4g的文件肯定不行
https://linux.cn/article-11682-1.html
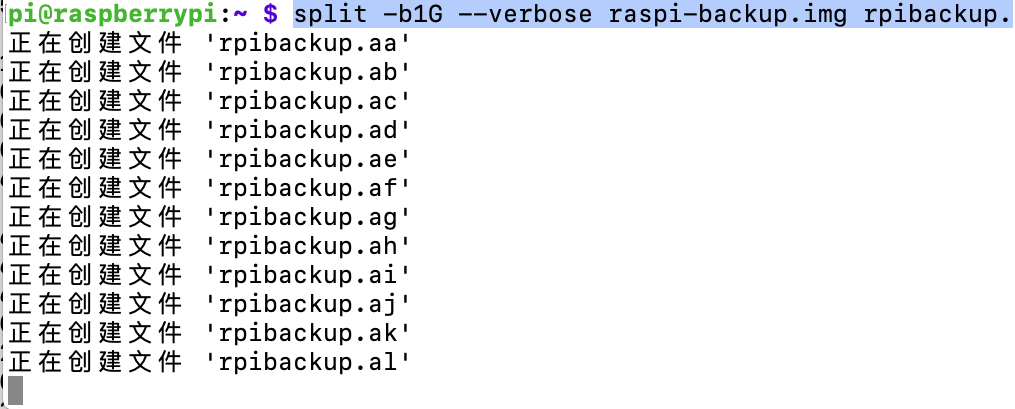
树莓派侧执行文件分割命令
# split -b1000M raspi-backup.imgsplit -b1G --verbose raspi-backup.img rpibackup.
远程侧执行如下指令
rsync "[email protected]:/home/pi/rpibackup.??" /Volumes/BACKUPDISK/mixdiy.com/backup 传输完成后执行合并指令
cat rpibackup.?? > raspi-backup.img如遇权限问题可执行以下命令
sudo sh -c 'rpibackup.?? > raspi-backup.img'注意:
如果将系统盘格式化为exfat32再烧入镜像,则系统无法启动
树莓派系统备份为img的最好方法
http://blog.dngz.net/813.htm
首先,不要用Win32DiskImager备份,不然备份出来文件超大。
用下面这个脚本备份文件才比实际使用空间大一点点。
将如下脚本保存为/tmp/back2img.sh
#!/bin/bash
if [ `whoami` != "root" ];then
    echo "This script must be run as root!"
    exit 1
fi
# install software
#apt update
apt install -y dosfstools parted kpartx rsync
echo ""
echo "software is ready"
file="rpi-`date +%Y%m%d%H%M%S`.img"
if [ "x$1" != "x" ];then
    file="$1"
fi
# boot mount point
boot_mnt=`findmnt -n /dev/mmcblk0p1 | awk '{print $1}'`
root_info=`df -PT / | tail -n 1`
root_type=`echo $root_info | awk '{print $2}'`
dr=`echo $root_info | awk '{print $4}'`
db=`df -P | grep /dev/mmcblk0p1 | awk '{print $2}'`
ds=`echo $dr $db |awk '{print int(($1+$2)*1.2)}'`
echo "create $file ..."
dd if=/dev/zero of=$file bs=1K count=0 seek=$ds
#truncate -s ${ds}k $file
start=`fdisk -l /dev/mmcblk0| awk 'NR==9 {print $2}'`
end=`fdisk -l /dev/mmcblk0| awk 'NR==9 {print $3}'`
if [ "$start" == "*" ];then
    start=`fdisk -l /dev/mmcblk0| awk 'NR==9 {print $3}'`
    end=`fdisk -l /dev/mmcblk0| awk 'NR==9 {print $4}'`
fi
start=`echo $start's'`
end=`echo $end's'`
end2=`fdisk -l /dev/mmcblk0| awk 'NR==10 {print $2}'`
end2=`echo $end2's'`
echo "start=$start"
echo "end=$end"
echo "end2=$end2"
parted $file --script -- mklabel msdos
parted $file --script -- mkpart primary fat32 $start $end
parted $file --script -- mkpart primary ext4 $end2 -1
loopdevice=`losetup -f --show $file`
device=`kpartx -va $loopdevice | sed -E 's/.*(loop[0-9])p.*/\1/g' | head -1`
device="/dev/mapper/${device}"
echo "device=$device"
partBoot="${device}p1"
partRoot="${device}p2"
echo "partBoot=$partBoot"
echo "partRoot=$partRoot"
sleep 5s
opartuuidb=`blkid -o export /dev/mmcblk0p1 | grep PARTUUID`
opartuuidr=`blkid -o export /dev/mmcblk0p2 | grep PARTUUID`
npartuuidb=`blkid -o export ${partBoot} | grep PARTUUID`
npartuuidr=`blkid -o export ${partRoot} | grep PARTUUID`
boot_label=`dosfslabel /dev/mmcblk0p1 | tail -n 1`
root_label=`e2label /dev/mmcblk0p2 | tail -n 1`
mkfs.vfat -F 32 -n "$boot_label" $partBoot
echo "$partBoot format success"
mkfs.ext4 $partRoot
e2label $partRoot $root_label
echo "$partRoot format success"
mount -t vfat $partBoot /mnt
cp -rfp ${boot_mnt}/* /mnt/
sed -i "s/$opartuuidr/$npartuuidr/g" /mnt/cmdline.txt
sync
umount /mnt
mount -t ext4 $partRoot /mnt
if [ -f /etc/dphys-swapfile ]; then
    SWAPFILE=`cat /etc/dphys-swapfile | grep ^CONF_SWAPFILE | cut -f 2 -d=`
    if [ "$SWAPFILE" = "" ]; then
        SWAPFILE=/var/swap
    fi
    EXCLUDE_SWAPFILE="--exclude $SWAPFILE"
fi
cd /mnt
rsync --force -rltWDEgop --delete --stats --progress \
    $EXCLUDE_SWAPFILE \
    --exclude ".gvfs" \
    --exclude "$boot_mnt" \
    --exclude "/dev" \
    --exclude "/media" \
    --exclude "/mnt" \
    --exclude "/proc" \
    --exclude "/run" \
    --exclude "/snap" \
    --exclude "/sys" \
    --exclude "/tmp" \
    --exclude "lost\+found" \
    --exclude "$file" \
    / ./
if [ ! -d $boot_mnt ]; then
    mkdir $boot_mnt
fi
if [ -d /snap ]; then
    mkdir /mnt/snap
fi
for i in boot dev media mnt proc run sys boot; do
    if [ ! -d /mnt/$i ]; then
        mkdir /mnt/$i
    fi
done
if [ ! -d /mnt/tmp ]; then
    mkdir /mnt/tmp
    chmod a+w /mnt/tmp
fi
cd
sed -i "s/$opartuuidb/$npartuuidb/g" /mnt/etc/fstab
sed -i "s/$opartuuidr/$npartuuidr/g" /mnt/etc/fstab
sync
umount /mnt
kpartx -d $loopdevice
losetup -d $loopdevice
用法,直接运行:
cd /tmp/
sudo ./back2img.sh blog.dngz.net.img
注意:如果TF卡剩余空间不够的话就挂载外部硬盘或U盘,将备份的img直接保存在外部磁盘中,并且外部磁盘请挂载到 /media 目录下,不要挂载到 /mnt!
因为脚本会对/mnt目录进行备份操作,会导致不断循环的递归备份,导致磁盘爆满。
总之记住一定不要挂载到/mnt目录!
运行时的备份日志:
Reading package lists... Done
Building dependency tree
Reading state information... Done
dosfstools is already the newest version (4.1-2).
parted is already the newest version (3.2-25).
rsync is already the newest version (3.1.3-6).
The following NEW packages will be installed:
  kpartx
0 upgraded, 1 newly installed, 0 to remove and 12 not upgraded.
Need to get 37.8 kB of archives.
After this operation, 86.0 kB of additional disk space will be used.
Get:1 https://mirrors.tuna.tsinghua.edu.cn/debian buster/main arm64 kpartx arm64 0.7.9-3+deb10u1 [37.8 kB]
Fetched 37.8 kB in 1s (47.2 kB/s)
Selecting previously unselected package kpartx.
(Reading database ... 49050 files and directories currently installed.)
Preparing to unpack .../kpartx_0.7.9-3+deb10u1_arm64.deb ...
Unpacking kpartx (0.7.9-3+deb10u1) ...
Setting up kpartx (0.7.9-3+deb10u1) ...
Processing triggers for man-db (2.8.5-2) ...
software is ready
create blog.dngz.net.img ...
0+0 records in
0+0 records out
0 bytes copied, 0.00126612 s, 0.0 kB/s
start=8192s
end=532479s
end2=532480s
device=/dev/mapper/loop0
partBoot=/dev/mapper/loop0p1
partRoot=/dev/mapper/loop0p2
mkfs.fat 4.1 (2017-01-24)
mkfs.fat: warning - lowercase labels might not work properly with DOS or Windows
/dev/mapper/loop0p1 format success
mke2fs 1.44.5 (15-Dec-2018)
Discarding device blocks: done
Creating filesystem with 739328 4k blocks and 185104 inodes
Filesystem UUID: ed9bf852-cd2f-4c1b-a9f6-d1e00bd20844
Superblock backups stored on blocks:
        32768, 98304, 163840, 229376, 294912
Allocating group tables: done
Writing inode tables: done
Creating journal (16384 blocks): done
Writing superblocks and filesystem accounting information: done
/dev/mapper/loop0p2 format success
sending incremental file list
rsync同步数据日志省略...
Number of files: 62,378 (reg: 48,951, dir: 5,618, link: 7,809)
Number of created files: 62,376 (reg: 48,951, dir: 5,616, link: 7,809)
Number of deleted files: 0
Number of regular files transferred: 48,951
Total file size: 2,260,121,595 bytes
Total transferred file size: 2,259,998,604 bytes
Literal data: 2,259,998,604 bytes
Matched data: 0 bytes
File list size: 1,703,776
File list generation time: 0.008 seconds
File list transfer time: 0.000 seconds
Total bytes sent: 2,264,157,862
Total bytes received: 990,956
sent 2,264,157,862 bytes  received 990,956 bytes  6,214,400.05 bytes/sec
total size is 2,260,121,595  speedup is 1.00
备份后blog.dngz.net.img 显示3.1G(实际占用2.4G),用7z极限压缩后仅为630M。
安装 PiShrink
要在 Linux 机器上安装 PiShrink,请先使用以下命令下载最新版本:
$ wget https://raw.githubusercontent.com/Drewsif/PiShrink/master/pishrink.sh接下来,将下载的 PiShrink 变成二进制可执行文件:
$ chmod +x pishrink.sh最后,移动到目录:
$ sudo mv pishrink.sh /usr/local/bin/使树莓派镜像更小
你可能已经知道,Raspbian 是所有树莓派型号的官方操作系统。树莓派基金会为 PC 和 Mac 开发了树莓派桌面版本。你可以创建一个 live CD,并在虚拟机中运行它,甚至也可以将其安装在桌面上。树莓派也有少量非官方操作系统镜像。为了测试,我从官方下载页面下载了官方的 Raspbian 系统。
解压下载的系统镜像:
$ unzip 2019-04-08-raspbian-stretch-lite.zip上面的命令将提取当前目录中 2019-04-08-raspbian-stretch-lite.zip 文件的内容。
让我们看下提取文件的实际大小:
$ du -h 2019-04-08-raspbian-stretch-lite.img
1.7G 2019-04-08-raspbian-stretch-lite.img
如你所见,提取的树莓派系统镜像大小为 1.7G。
现在,使用 PiShrink 缩小此文件的大小,如下所示:
$ sudo pishrink.sh 2019-04-08-raspbian-stretch-lite.img示例输出:
Creating new /etc/rc.local
rootfs: 39795/107072 files (0.1% non-contiguous), 239386/428032 blocks
resize2fs 1.45.0 (6-Mar-2019)
resize2fs 1.45.0 (6-Mar-2019)
Resizing the filesystem on /dev/loop1 to 280763 (4k) blocks.
Begin pass 3 (max = 14)
Scanning inode table XXXXXXXXXXXXXXXXXXXXXXXXXXXXXXXXXXXXXXXX
Begin pass 4 (max = 3728)
Updating inode references XXXXXXXXXXXXXXXXXXXXXXXXXXXXXXXXXXXXXXXX
The filesystem on /dev/loop1 is now 280763 (4k) blocks long.
Shrunk 2019-04-08-raspbian-stretch-lite.img from 1.7G to 1.2G
正如你在上面的输出中看到的,树莓派镜像的大小已减少到 1.2G。
你还可以使用 -s 标志跳过该过程的自动扩展部分。
$ sudo pishrink.sh -s 2019-04-08-raspbian-stretch-lite.img newpi.img这将创建一个源镜像文件(即 2019-04-08-raspbian-stretch-lite.img)的副本到一个新镜像文件(newpi.img)并进行处理。有关更多详细信息,请查看最后给出的官方 GitHub 页面。