Notice: Function _load_textdomain_just_in_time was called incorrectly. Translation loading for the simply-static domain was triggered too early. This is usually an indicator for some code in the plugin or theme running too early. Translations should be loaded at the init action or later. Please see Debugging in WordPress for more information. (This message was added in version 6.7.0.) in /var/www/html/wp-includes/functions.php on line 6121
树莓派 – 第 7 页

ESP32-C3串口通信定时开关机延时摄影

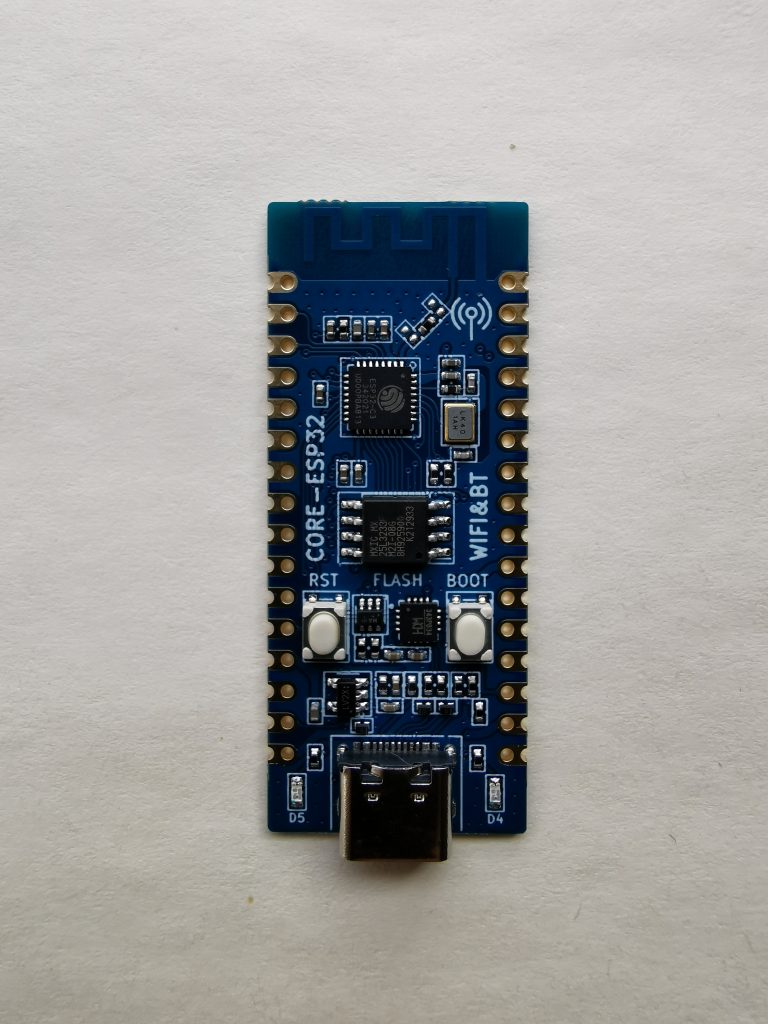
esp32-c3系列因其低廉的价格颇具竞争力,某宝买了个9.9的esp32-c3开发板,用micropython开发uart通信,一开始接上电路板丝印的RX、TX引脚,但一直未能通信甚至干扰了调试,咨询厂家,因C3系列较新,厂家FAE也不熟悉micropython,翻看micropython官网等也找不到相关资料,给调试工作带来很大麻烦。这里提供一个简单的方法找出uart引脚,也就一行代码:

esp32-c3开发板正面
esp32-c3开发板背面
注意点一:
uart = machine.UART(1, baudrate=115200,timeout=10)
print(uart)
#此时可以看到rx=10,tx=9,但如果将树莓派的tx、rx分别接esp32C3的引脚10和9,则不会有任何信息,这是最大的坑,此时需将上述代码更新为
uart = machine.UART(1, baudrate=115200,rx=10,tx=9,timeout=10)
这样就没有任何问题了
注意点二:
上位机程序的timeout数值一定要大于等于下位机time.sleep的时间

全部代码如下:

import ntptime
import network,time
import machine
from machine import Pin,RTC
rtc = RTC()
#print("同步前本地时间:%s" %str(time.localtime()))
led=Pin(2,Pin.OUT)
# 联WIFI
def WIFI_Connect():
    wlan = network.WLAN(network.STA_IF) #STA模式
    wlan.active(True)                   #激活接口
    start_time=time.time()              #记录时间做超时判断
    if not wlan.isconnected():
        print('connecting to network...')
        wlan.connect('HUAWEI', 'china') #输入WIFI账号密码
        while not wlan.isconnected():
            if time.time()-start_time > 15 :
                print('WIFI Connected Timeout!')
                break
    if wlan.isconnected():
        print('connected!')
        print('network information:', wlan.ifconfig())
# 同步时间
def sync_ntp():
     ntptime.NTP_DELTA = 3155644800   # 可选 UTC+8偏移时间(秒),不设置就是UTC0
     ntptime.host = 'ntp1.aliyun.com'  # 可选,ntp服务器,默认是"pool.ntp.org"
     try:
         ntptime.settime()   # 修改设备时间,到这就已经设置好了
     except:
         for i in range(6):
            led.value(1)              #turn off 0是亮
            time.sleep(0.1)
            led.value(0)
            time.sleep(0.1)
         print('同步失败')
uart = machine.UART(1, baudrate=115200,rx=10,tx=9,timeout=10)
#uart = machine.UART(1, baudrate=115200, timeout=10)
p22 = Pin(6, Pin.OUT)
readmsg = ''
sendmsg = '1'
WIFI_Connect()
while True:
    sync_ntp()
    dt=time.localtime()
    print(uart)
    time.sleep(20)
    if uart.any() > 0:
        readmsg = uart.read()
        print(readmsg)
        if '2' in readmsg:
            uart.write(sendmsg)
            if dt[3]>=20:
                print('power off')
                p22.on()
                time.sleep(0.5)
                p22.off()
        else:
            print(readmsg)
            print('reset now')
            p22.on()
            time.sleep(0.5)
            p22.off()
    elif uart.any()==0:                             #多次读取,防止有信息丢失导致误判
        print(dt[3])
        if dt[3]>=0 and dt[3]<20:      #如白天读不到信息则开机
            print('power on')
            p22.on()
            time.sleep(0.5)
            p22.off()

改进版本(自动根据上位机发送的串口信息生成包含wifi及开关机时间等信息的配置文件,避免了在烧录程序时写死wifi密码等信息)

import ntptime
import network,time
import machine
from machine import Pin,RTC
uart = machine.UART(1, baudrate=115200,rx=10,tx=9,timeout=10)
readmsg = ''
sendmsg = 'huanghe'
rtc = RTC()
#print("同步前本地时间:%s" %str(time.localtime()))
led=Pin(2,Pin.OUT)
# 联WIFI
def WIFI_Connect():
    wlan = network.WLAN(network.STA_IF) #STA模式
    wlan.active(True)                   #激活接口
    start_time=time.time()              #记录时间做超时判断
    if not wlan.isconnected():
        print('connecting to network...'+ssid[1])
        wlan.connect(ssid[1], pwd[1]) #输入WIFI账号密码
        while not wlan.isconnected():
            if time.time()-start_time > 15 :
                print('WIFI Connected Timeout!')
                break
    if wlan.isconnected():
        print('connected!')
        print('network information:', wlan.ifconfig())
# 同步时间
def sync_ntp():
     ntptime.NTP_DELTA = 3155644800   # 可选 UTC+8偏移时间(秒),不设置就是UTC0
     ntptime.host = 'ntp1.aliyun.com'  # 可选,ntp服务器,默认是"pool.ntp.org"
     try:
         ntptime.settime()   # 修改设备时间,到这就已经设置好了
     except:
         for i in range(6):
            led.value(1)              #turn off 0是亮
            time.sleep(0.1)
            led.value(0)
            time.sleep(0.1)
         print('同步失败')
#uart = machine.UART(1, baudrate=115200, timeout=10)
p22 = Pin(6, Pin.OUT)
try:
    with open('config.txt',mode='r',encoding='utf-8') as f:
        s=f.read().split(',')
        ssid=s[0].split(':')
        pwd=s[1].split(':')
        startt=s[2].split(':')
        endt=s[3].split(':')
        print(startt[1])
        print(endt[1])
except:
    print('config file error')
    time.sleep(5)   #必不可少,并且时间不能小于上位机发送定时
    if uart.any() > 0:
        readmsg = uart.read()
        print(readmsg)
        if 'SSID' in readmsg:
            content = readmsg
            with open('config.txt',mode='w',encoding='utf-8') as f:
                f.write(content)
            machine.reset()
try:
    WIFI_Connect()
except:
    print('wifi connect error')
while True:
    sync_ntp()
    dt=time.localtime()
    print(uart)
    time.sleep(20)
    if uart.any() > 0:
        readmsg = uart.read()
        print(readmsg)
        if 'changjiang' in readmsg:
            uart.write(sendmsg)
            print('dt[3]='+str(dt[3]))
            print('endt[1]='+endt[1])
            if dt[3]>=int(endt[1]):
                print('power off')
                p22.on()
                time.sleep(0.5)
                p22.off()
        else:
            print(readmsg)
            print('reset now')
            p22.on()
            time.sleep(0.5)
            p22.off()
    elif uart.any()==0:                             #多次读取,防止有信息丢失导致误判
        print(dt[3])
        if dt[3]>=int(startt[1]) and dt[3]<int(endt[1]):      #如白天读不到信息则开机
            print('power on')
            p22.on()
            time.sleep(0.5)
            p22.off()

去错版本

#coding:utf-8
import ntptime
import network,time
import machine
import os
from machine import Pin,RTC
uart = machine.UART(1, baudrate=115200,rx=10,tx=9,timeout=10)
readmsg = ''
sendmsg = 'huanghe'
startt=6
endt=20
rtc = RTC()
#print("同步前本地时间:%s" %str(time.localtime()))
led=Pin(2,Pin.OUT)
# 联WIFI
def WIFI_Connect():
    wlan = network.WLAN(network.STA_IF) #STA模式
    wlan.active(True)                   #激活接口
    start_time=time.time()              #记录时间做超时判断
    if not wlan.isconnected():
        print('connecting to network...'+ssid[1])
        wlan.connect(ssid[1], pwd[1]) #输入WIFI账号密码
        while not wlan.isconnected():
            if time.time()-start_time > 15 :
                print('WIFI Connected Timeout!')
                break
    if wlan.isconnected():
        print('connected!')
        print('network information:', wlan.ifconfig())
# 同步时间
def sync_ntp():
     ntptime.NTP_DELTA = 3155644800   # 可选 UTC+8偏移时间(秒),不设置就是UTC0
     ntptime.host = 'ntp1.aliyun.com'  # 可选,ntp服务器,默认是"pool.ntp.org"
     try:
         ntptime.settime()   # 修改设备时间,到这就已经设置好了
     except:
         for i in range(6):
            led.value(1)              #turn off 0是亮
            time.sleep(0.1)
            led.value(0)
            time.sleep(0.1)
         print('同步失败')
#uart = machine.UART(1, baudrate=115200, timeout=10)
p22 = Pin(6, Pin.OUT)
try:
    with open('config.txt',mode='r',encoding='utf-8') as f:
        s=f.read().split(',')
        if 'SSID' and 'PWD' and 'START' and 'END' and 'changjiang' in s:
            ssid=s[0].split(':')
            pwd=s[1].split(':')
            startt=s[2].split(':')
            endt=s[3].split(':')
            startta=startt[1]
            endta=endt[1]
            print(startta)
            print(endta)
        else:
            print('file format error,will drop it')
            os.remove('config.txt')
except:
    print('config file not find')
    startta=6
    endta=20
    time.sleep(5)   #必不可少,并且时间不能小于上位机发送定时
    if uart.any() > 26:  #接受字符串个数
        readmsg = uart.read()
        print(readmsg)
        if 'SSID' and 'PWD' and 'START' and 'END' and 'changjiang' in str(readmsg):
            content = readmsg
            with open('config.txt',mode='w',encoding='utf-8') as f:
#                f.seek(0)
                f.write(content)
            machine.reset()
        else:
            try:
                os.remove('config.txt')
            except:
                print('未找到待删除文件')
try:
    WIFI_Connect()
except:
    print('wifi connect error')
while True:
    sync_ntp()
    dt=time.localtime()
    readmsg = uart.read()
    print(uart)
    time.sleep(20)
    if uart.any() > 0:
        readmsg = uart.read()
        print(readmsg)
        if 'changjiang' in readmsg:
            uart.write(sendmsg)
            print('dt[3]='+str(dt[3]))
            print('endt[1]='+str(endta))
            if dt[3]>=int(endta):
                print('power off')
                p22.on()
                time.sleep(0.5)
                p22.off()
        else:
            print(readmsg)
            print('reset now')
            p22.on()
            time.sleep(0.5)
            p22.off()
    elif uart.any()==0:                             #多次读取,防止有信息丢失导致误判
        print(dt[3])
        if dt[3]>=int(startta) and dt[3]<int(endta):      #如白天读不到信息则开机
            print('power on')
            p22.on()
            time.sleep(0.5)
            p22.off()

对应上位机程序

import serial #导入模块
with open('/home/pi/config.txt',mode='r',encoding='utf-8') as f:
    s=f.read()
#端口,GNU/Linux上的/dev/ttyUSB0 等或Windows上的 COM3 等
portx="/dev/ttyAMA0"
#波特率,标准值之一:50,75,110,134,150,200,300,600,1200,1800,2400,4800,9600,19200,38400,57600,115200
bps=115200
#超时设置,None:永远等待操作,0为立即返回请求结果,其他值为等待超时时间(单位为秒)
timex=5
# 打开串口,并得到串口对象
ser=serial.Serial(portx,bps,timeout=timex)
while True:
    # 写数据
    send=s
    result=ser.write(send.encode())
    print("写总字节数:",result)
    str1 =ser.readline().decode()
    if('huanghe' in str1):
        print(str1)
ser.close()#关闭串口

更新版本

ESP32-C3侧

#coding:utf-8
from machine import UART,Pin,RTC
import machine
import time,network
import ntptime
led=Pin(2,Pin.OUT)
rtc = RTC()
def linedetect():
    uart=UART(1,baudrate=115200,tx=6,rx=7,timeout=5)
    idsend='huanghe'
    idreceive='changjiang'
    uart.write(idsend)
    time.sleep(15)      #树莓派启动需要的时间,否则会反复重启
    receive_data=uart.readline()
    if (idreceive in str(receive_data)):
        return 1
    else:
        return 0
def onoff(pinnum):
    p = Pin(pinnum, Pin.OUT)
    p.on()
    time.sleep(0.5)
    p.off()
def createconfigfile(filename):
    uart=UART(1,baudrate=115200,tx=6,rx=7,timeout=5)
    time.sleep(5)
    readmsg = uart.readline()
    if 'SSID' and 'PWD' and 'START' and 'END' and 'changjiang' in str(readmsg):
        content = readmsg
        with open(filename,mode='w',encoding='utf-8') as f:
            f.write(content)
def readconfigfile(filename):
    with open(filename,mode='r',encoding='utf-8') as f:
        s=f.read().split(',')
        if 'SSID' and 'PWD' and 'START' and 'END' and 'changjiang' in s:
            ssid=s[0].split(':')[1]
            pwd=s[1].split(':')[1]
            startt=s[2].split(':')[1]
            endt=s[3].split(':')[1]
            return ssid,pwd,startt,endt
        else:
            print('file format error,will drop it')
            os.remove(filename)
# 同步时间
def sync_ntp():
     ntptime.NTP_DELTA = 3155644800   # 可选 UTC+8偏移时间(秒),不设置就是UTC0
     ntptime.host = 'ntp1.aliyun.com'  # 可选,ntp服务器,默认是"pool.ntp.org"
     try:
         ntptime.settime()   # 修改设备时间,到这就已经设置好了
     except:
         for i in range(6):
            led.value(1)              #turn off 0是亮
            time.sleep(0.1)
            led.value(0)
            time.sleep(0.1)
         print('同步失败')
# 联WIFI
def WIFI_Connect(ssid,pwd):
    wlan = network.WLAN(network.STA_IF) #STA模式
    wlan.active(True)                   #激活接口
    start_time=time.time()              #记录时间做超时判断
    if not wlan.isconnected():
        print('connecting to network...'+ssid)
        wlan.connect(ssid, pwd) #输入WIFI账号密码
        while not wlan.isconnected():
            if time.time()-start_time > 15 :
                print('WIFI Connected Timeout!')
                break
    if wlan.isconnected():
        print('connected!')
try:
    a,b,c,d=readconfigfile('config.txt')
except:
    print('error')
    createconfigfile('config.txt')
    machine.reset()
WIFI_Connect(a,b)
sync_ntp()
print(a,b,c,d)
while True:
    dt=time.localtime()
    print(dt)
    linestate=linedetect()
    if linestate!=0:
        print('on line')
        if dt[3]>int(d):
            onoff(4)
    else:
        print('off line')
        if (dt[3]<=int(d) and dt[3]>int(c)):
            onoff(4)
'''
while True:
    a=linedetect()
    if a==0:
        print('off line')
    else:
        print('on line')
'''

树莓派侧

import serial
i=0
with open('/home/pi/config.txt',mode='r',encoding='utf-8') as f:
   s=f.read()
Port = '/dev/ttyAMA0'
ser = serial.Serial(Port,115200,timeout=15)
while True:
   send=s
   ser.write(send.encode('utf-8'))
   str1=ser.read(7).decode('utf-8')
   if ('huanghe' in str(str1)):
      print(str1+' '+str(i))
   else:
      print('get info is '+str(str1))
ser.close

注:uart连接一定要接地,否则会报错

开关机时间调整

#coding:utf-8
from machine import UART,Pin,RTC
import machine
import time,network
import ntptime
import os
led1=Pin(12,Pin.OUT)
led2=Pin(13,Pin.OUT)
rtc = RTC()
k=0
def linedetect():
    uart=UART(1,baudrate=115200,tx=6,rx=7,timeout=1)  #设置Pin6=tx,Pin7=rx
    idsend='huanghe'
    idreceive='changjiang'
    uart.write(idsend)
    time.sleep(5)      #树莓派启动需要的时间,否则会反复重启
    receive_data=uart.readline()
    if (idreceive in str(receive_data)):
        return 1
    else:
        return 0
def onoff(pinnum):
    p = Pin(pinnum, Pin.OUT)
    p.on()
    time.sleep(0.5)
    p.off()
def createconfigfile(filename):
    uart=UART(1,baudrate=115200,tx=6,rx=7,timeout=1)
    time.sleep(5)
    readmsg = uart.readline()
    if 'SSID' and 'PWD' and 'START' and 'END' and 'changjiang' in str(readmsg):
        content = readmsg
        with open(filename,mode='w',encoding='utf-8') as f:
            f.write(content)
def readconfigfile(filename):
    with open(filename,mode='r',encoding='utf-8') as f:
        s=f.read().strip('\n').split(',')
        if 'SSID' and 'PWD' and 'START' and 'END' and 'changjiang' in s:
            ssid=s[0].split(':')[1]
            pwd=s[1].split(':')[1]
            startt=s[2].split(':')[1]
            endt=s[3].split(':')[1]
            return ssid,pwd,startt,endt
        else:
            print('config file format error,will drop it')
            os.remove(filename)
# 同步时间
def sync_ntp():
     ntptime.NTP_DELTA = 3155644800   # 可选 UTC+8偏移时间(秒),不设置就是UTC0
     ntptime.host = 'ntp1.aliyun.com'  # 可选,ntp服务器,默认是"pool.ntp.org"
     try:
         ntptime.settime()   # 修改设备时间,到这就已经设置好了
     except:
         for i in range(6):
            led1.value(1)              #turn off 0是亮
            time.sleep(0.1)
            led1.value(0)
            time.sleep(0.1)
         print('同步失败')
# 联WIFI
def WIFI_Connect(ssid,pwd):
    wlan = network.WLAN(network.STA_IF) #STA模式
    wlan.active(True)                   #激活接口
    start_time=time.time()              #记录时间做超时判断
    if not wlan.isconnected():
        print('connecting to network...'+ssid)
        wlan.connect(ssid, pwd) #输入WIFI账号密码
        time.sleep(1)
        while not wlan.isconnected():
            if time.time()-start_time > 15 :
                print('wifi Connected Timeout!')
                os.remove('config.txt')
                machine.reset()
    if wlan.isconnected():
        print('wifi was connected!')
try:
    a,b,c,d=readconfigfile('config.txt')
except:
    print('can not find config.txt,will create it!')
    createconfigfile('config.txt')
    time.sleep(2)
    machine.reset()
WIFI_Connect(a,b)
print(a,b,c,d)
while True:
    led2.value(1)
    time.sleep(0.1)
    led2.value(0)
    time.sleep(0.1)
    sync_ntp()
    dt=time.localtime()
    print(dt)
    linestate=linedetect()
    if linestate!=0:
        print('on line')
        if dt[3]>=int(d):
            onoff(2)
    else:
        print('off line')
        if (dt[3]<int(d) and dt[3]>=int(c)):
            onoff(2)

自动同步上位机配置文件更新

ESP-32-C3程序

#coding:utf-8
from machine import UART,Pin,RTC
import machine
import time,network
import ntptime
import os
led1=Pin(12,Pin.OUT)
led2=Pin(13,Pin.OUT)
rtc = RTC()
k=0
def linedetect():
    uart=UART(1,baudrate=115200,tx=6,rx=7,timeout=1)  #设置Pin6=tx,Pin7=rx
    idsend='huanghe'
    idreceive='changjiang'
    uart.write(idsend)
    time.sleep(5)      #树莓派启动需要的时间,否则会反复重启
    receive_data=uart.readline()
    if (idreceive in str(receive_data)):
        return 1
    else:
        return 0
def onoff(pinnum):
    p = Pin(pinnum, Pin.OUT)
    p.on()
    time.sleep(0.5)
    p.off()
def createconfigfile(filename):
    uart=UART(1,baudrate=115200,tx=6,rx=7,timeout=1)
    time.sleep(5)
    readmsg = uart.readline()
    if 'SSID' and 'PWD' and 'START' and 'END' and 'changjiang' in str(readmsg):
        content = readmsg
        with open(filename,mode='w',encoding='utf-8') as f:
            f.write(content)
def readconfigfile(filename):
    with open(filename,mode='r',encoding='utf-8') as f:
        s=f.read().strip('\n').split(',')
        if 'SSID' and 'PWD' and 'START' and 'END' and 'changjiang' in s:
            ssid=s[0].split(':')[1]
            pwd=s[1].split(':')[1]
            startt=s[2].split(':')[1]
            endt=s[3].split(':')[1]
            return ssid,pwd,startt,endt
        else:
            print('config file format error,will drop it')
            os.remove(filename)
# 同步时间
def sync_ntp():
     ntptime.NTP_DELTA = 3155644800   # 可选 UTC+8偏移时间(秒),不设置就是UTC0
     ntptime.host = 'ntp1.aliyun.com'  # 可选,ntp服务器,默认是"pool.ntp.org"
     try:
         ntptime.settime()   # 修改设备时间,到这就已经设置好了
     except:
         for i in range(6):
            led1.value(1)              #turn off 0是亮
            time.sleep(0.1)
            led1.value(0)
            time.sleep(0.1)
         print('同步失败')
# 联WIFI
def WIFI_Connect(ssid,pwd):
    wlan = network.WLAN(network.STA_IF) #STA模式
    wlan.active(True)                   #激活接口
    start_time=time.time()              #记录时间做超时判断
    if not wlan.isconnected():
        print('connecting to network...'+ssid)
        wlan.connect(ssid, pwd) #输入WIFI账号密码
        time.sleep(1)
        while not wlan.isconnected():
            if time.time()-start_time > 15 :
                print('wifi Connected Timeout!')
                os.remove('config.txt')
                machine.reset()
    if wlan.isconnected():
        print('wifi was connected!')
try:
    a,b,c,d=readconfigfile('config.txt')
except:
    print('can not find config.txt,will create it!')
    createconfigfile('config.txt')
    time.sleep(2)
    machine.reset()
WIFI_Connect(a,b)
print(a,b,c,d)
while True:
    led2.value(1)
    time.sleep(0.1)
    led2.value(0)
    time.sleep(0.1)
    sync_ntp()
    dt=time.localtime()
    print(dt)
    linestate=linedetect()
    if linestate!=0:
        print('on line')
        if dt[3]>=int(d):
            onoff(2)
    else:
        print('off line')
        if (dt[3]<int(d) and dt[3]>=int(c)):
            onoff(2)

树莓派侧程序

#coding:utf-8
import serial
import time
with open('/home/pi/config.txt',mode='r',encoding='utf-8') as f:
   s=f.read()
i=0
Port ="/dev/ttyAMA0"
ser = serial.Serial(Port,115200,timeout=1)
while True:
#   send = 'SSID:HUAWEI-WULIAN,PWD:onlychina,START:6,END:20,changjiang'
   send=s
   i=i+1
   ser.write(send.encode('utf-8'))
#   str = ser.readline().decode()
   str1 = ser.readline().decode('utf-8')
#   time.sleep(5)
   if('huanghe' in str(str1)):
      print(str1+' '+str(i))
   else:
      print('can not get right info ,now info is '+str(str1))
      with open('/home/pi/config.txt',mode='r',encoding='utf-8') as f:
         s=f.read()
ser.close()

改进Ctrl+c的中断事件

#coding:utf-8
import serial
import time
try:
    s=''
    try:
        with open('/home/pi/config.json',mode='r',encoding='utf-8') as f:
           s=f.read()
    except:
        print("File 'config.json' can not find in dir /home/pi/,please create it first and run again.未能在/home/pi/目录下发现文件config.json,请按要求创建后再执行此程序")
    i=0
    Port ="/dev/ttyAMA0"
    ser = serial.Serial(Port,115200,timeout=1)
    while True:
    #   send = 'SSID:HUAWEI-WULIAN,PWD:onlychina,START:6,END:20,changjiang'
       send=s
       i=i+1
       ser.write(send.encode('utf-8'))
    #   str = ser.readline().decode()
       str1 = ser.readline().decode('utf-8')
    #   time.sleep(5)
       if('hello' in str(str1)):
          print(str1+' '+str(i))
       else:
          print('can not get right info ,now info is '+str(str1))
    ser.close()
except KeyboardInterrupt:
    print("Application exit!")
#coding:utf-8
from machine import UART,Pin,RTC
import machine
import time,network
import ntptime
import os
led1=Pin(12,Pin.OUT)
led2=Pin(13,Pin.OUT)
rtc = RTC()
k=0
def linedetect():
    uart=UART(1,baudrate=115200,tx=6,rx=7,timeout=1)  #设置Pin6=tx,Pin7=rx
    idsend='hello'
    idreceive='world'
    uart.write(idsend)
    time.sleep(5)      #树莓派启动需要的时间,否则会反复重启
    receive_data=uart.readline()
    if (idreceive in str(receive_data)):
        return 1
    else:
        return 0
def onoff(pinnum):
    p = Pin(pinnum, Pin.OUT)
    p.on()
    time.sleep(0.5)
    p.off()
def createconfigfile(filename):
    uart=UART(1,baudrate=115200,tx=6,rx=7,timeout=1)
    time.sleep(5)
    readmsg = uart.readline()
    if 'SSID' and 'PWD' and 'START' and 'END' and 'world' in str(readmsg):
        content = readmsg
        with open(filename,mode='w',encoding='utf-8') as f:
            f.write(content)
def readconfigfile(filename):
    with open(filename,mode='r',encoding='utf-8') as f:
        s=f.read().strip('\n').split(',')
        if 'SSID' and 'PWD' and 'START' and 'END' and 'world' in s:
            ssid=s[0].split(':')[1]
            pwd=s[1].split(':')[1]
            startt=s[2].split(':')[1]
            endt=s[3].split(':')[1]
            return ssid,pwd,startt,endt
        else:
            print('config file format error,will drop it')
            os.remove(filename)
# 同步时间
def sync_ntp():
     ntptime.NTP_DELTA = 3155644800   # 可选 UTC+8偏移时间(秒),不设置就是UTC0
     ntptime.host = 'ntp1.aliyun.com'  # 可选,ntp服务器,默认是"pool.ntp.org"
     try:
         ntptime.settime()   # 修改设备时间,到这就已经设置好了
     except:
         for i in range(6):
            led1.value(1)              #turn off 0是亮
            time.sleep(0.1)
            led1.value(0)
            time.sleep(0.1)
         print('同步失败')
# 联WIFI
def WIFI_Connect(ssid,pwd):
    wlan = network.WLAN(network.STA_IF) #STA模式
    wlan.active(True)                   #激活接口
    start_time=time.time()              #记录时间做超时判断
    if not wlan.isconnected():
        print('connecting to network...'+ssid)
        wlan.connect(ssid, pwd) #输入WIFI账号密码
        time.sleep(1)
        while not wlan.isconnected():
            if time.time()-start_time > 15 :
                print('wifi Connected Timeout!')
                os.remove('config.json')
                machine.reset()
    if wlan.isconnected():
        print('wifi was connected!')
try:
    a,b,c,d=readconfigfile('config.json')
except:
    print('can not find config.json,will create it!')
    createconfigfile('config.json')
    time.sleep(2)
    machine.reset()
WIFI_Connect(a,b)
print(a,b,c,d)
while True:
    led2.value(1)
    time.sleep(0.1)
    led2.value(0)
    time.sleep(0.1)
    sync_ntp()
    dt=time.localtime()
    print(dt)
    linestate=linedetect()
    if linestate!=0:
        print('on line')
        if dt[3]>=int(d):
            onoff(2)
    else:
        print('off line')
        if (dt[3]<int(d) and dt[3]>=int(c)):
            onoff(2)

树莓派自动开关机执行延时录像

esp32侧程序,功能有3个,1、是连接Wi-Fi同步网络时间,2、是通过UART口跟树莓派进行通信,检查树莓派是否在预定时间内工作或关机,3、根据时间段控制树莓派开机或关机。该程序在esp32上的文件名为main.py(记得要改名),这样esp32一通电即可工作。程序如下:

上位机(树莓派)与esp32的通信程序check.py,程序如下:

import serial
Port = "/dev/ttyAMA0"
ser = serial.Serial(Port, baudRate, timeout=10)
while True:
   send = '2'
   ser.write(send.encode())
   str = ser.readline().decode()
   if(str !=""):
      print(str)
ser.close()

该程序需要开机自动运行,具体可以将其加入rc.local,具体:

sudo nano /etc/rc.local

在最后一行前加入:python check.py,保存退出重启即可

注意:

树莓派使用串口需要进行以下工作:

1、sudo raspi-config

根据以下步骤进行设置:

选择Interfacing Options

选择serial

再选择 no,禁用串口登录功能,将串口用于通信。
再选择 yes,启动串口硬件。
禁用蓝牙(硬件串口与mini串口默认映射对换

接线:(树莓派(左)——esp32(右))

RXD(GPIO15) <——> TXD(IO12)、TXD(GPIO14) <——> RXD(IO13)、GND <——> GND

sudo nano /boot/config.txt

在打开的文件最后面添加:
(注意:树莓派4b也一样是pi3)

dtoverlay=pi3-disable-bt

修改保存后重启树莓派:

reboot

安装serial,具体如下:

sudo apt-get install python3-serial

烧录esp8266注意事项

很多人第一次用USB转串口模块烧录esp8266失败,这里有几个注意事项:

USB转串口模块与esp8266的接线方式如下:

1、RX->TX,2、TX->RX,3、3V3->3V3,4、GND->GND,以上接线需要确认好。

还有就是要特别注意的一点:烧录时IO0需要接地,烧录成功后需要断开IO0与GND的连接。另外固件选择要对,我的模块很便宜,选择是1M flash的,具体可以到micropython.org上下载对应固件,thonny这个软件就可以直接烧录,而不需要下载esptool工具。

树莓派通过usb摄像头定时拍照

树莓派使用usb摄像头需要安装fswebcam,具体如下:

1、sudo apt-get install fswebcam

2、sudo nano capture.sh

#!/bin/bash
#DATE=$(TZ=UTC-8 date +%Y-%m-%d" "%H:%M:%S)
DATE=$(date +%Y-%m-%H-%M)
fswebcam -d /dev/video0 --no-banner -r 1024X768 -S 60 -D 2 -F 2 /home/pi/$DATE.jpg

3、chmod +x capture.sh

4、crontab -e

* * * * * /home/pi/capture.sh >/dev/null 2>&1

5、记得重启crontab

#重启crontab程序
sudo /etc/init.d/cron restart

fswebcam参数详解
-? –help 显示此帮助页面并退出
-c –config <文件名> 从文件加载配置
-q –quiet 隐藏所有消息(错误除外)
-v –verbose 捕获时显示额外的消息
–version 显示版本并退出
-l –loop <秒> 循环运行
-b –background 在后台运行
-o –output <文件名> 将日志输出到文件
-d –device <摄像头> 设置要使用的摄像头
-i –input 选择要使用的输入
-t –tuner 选择要使用的调谐器
-f –frequency 选择频率使用
-p –palette 选择要使用的调色板格式
-D –delay 设置预捕获延迟时间(秒)
-r –resolution <宽x高> 设置拍摄分辨率
–fps <帧率> 设置捕获帧率
-F –frames 设置要拍摄的帧数
-S –skip 设置要跳过的帧数
–dumpframe 将原始帧转储到文件
-s –set = 设定参数值
–revert 恢复原始捕获的图像
–flip 翻转图像
–crop [,] 裁剪图像的一部分
–scale 缩放图像
–rotate 垂直旋转图像
–deinterlace 减少隔行失真
–invert 反转图像颜色
–greyscale 去除图像的颜色
–swapchannels 交换c1和c2的通道
–no-banner 隐藏横幅
–top-banner 将横幅放在顶部
–bottom-banner 将横幅放在底部(默认)
–banner-colour 设置横幅颜色(#AARRGGBB)
–line-colour 设置横幅线条颜色
–text-colour 设置文字颜色
–font <[name][:size]> 设置字体和和大小
–no-shadow 禁用文字阴影
–shadow 启用文字阴影
–title 设置主标题(左上方)
–no-title 清除主标题
–subtitle 设置字幕 (左下方)
–no-subtitle 清除字幕
–timestamp 设置时间戳格式(右上)
–no-timestamp 清除时间戳记
–gmt 使用GMT代替本地时区
–info 设置信息文本(右下)
–no-info 清除信息文本
–underlay 设置参考图像
–no-underlay 清除底衬
–overlay 设置覆盖图像
–no-overlay 清除覆盖
–jpeg 输出JPEG图像
–png 输出PNG图像(-1, 0 – 10)
–save <文件名> 将图像保存到文件
–exec <命令> 执行命令并等待其完成

pico+tensorflow

Raspberry Pi Pico,上市不足3个月,售价仅有4美元,擅长低时延的 I/O 通信和模拟信号输入,功耗低,可以弥补树莓派在与物理世界互动方面的不足。今天我们项目分享就用Pi Pico+Edge Impulse实现入侵者监测系统。

该项目将热像仪数据给Raspberry Pi Pico,再使用Tensorflow Lite模型分析,达到在黑暗中检测入侵者的目的。这个项目有两大优点:

1)虽然很多家庭会安装摄像头,但有一些是无法在黑暗中工作的。项目中使用的热像仪监测就没有这个问题了。

2)如果一个动物入侵,我们不希望电子设备误报,摄像头肯定是做不到的。这个项目借助Edge Impulse可以准确无误判断当前入侵的是不是人。

注:Tensorflow Lite是针对移动、嵌入式以及IoT设备的工具,能够在终端本地运行机器学习模型的能力,而不必将数据上传到云端服务器进行分析。这样不仅节省网络流量,并且可以用户自己的隐私。

Edge Impulse在线网站自行训练进行分类识别。使用EdgeImpulse在线训练主要分为以下四个步骤:数据集采集、上传、训练以及部署。

01 项目使用到的软硬件

硬件部分:

  • 树莓派PICO开发板
  • MLX90640热成像夜视摄像头
  • Seeed Wio 终端
  • LED灯

开发软件:

  • Raspberry Pi Pico C / C ++ SDK

02 训练数据集

在机器学习项目中,第一步也是最重要的一步是收集训练数据,使训练集能够涵盖给定任务的大多数代表性的案例。

这里使用Seeed Wio终端进行数据采集。Wio终端上的3个按钮用于标记3个类(人,目标和背景)。把收集到的数据保存到Wio终端内置的micro SD卡中。每个热图像数据被捕获为一个单独的文件。该文件不包含标题行,只包含以逗号分隔的768(24×32)个温度读数。示例文件内容如下所示:

采集到的数据的直观表现如下:

03 将数据上传至Edge Impulse

当前,Edge Impulse不支持非时间序列数据类型(图像除外)。为了使用Edge Impulse,数据被假定为时间序列的实例。下面的代码是将原始数据转换为Edge Impluse的数据采集JSON格式。(全部代码可以在“达尔闻说”回复:入侵检测。)

  • import json
  • import time
  • import hmac
  • import hashlib
  • import os
  • HMAC_KEY = “<insert your edge impulse hmac key>”
  • labels = { 
  • ‘1’: ‘Person’,
  • ‘2’: ‘Object’,
  • ‘3’: ‘Background’
  • }
  • dir = ‘raw_data’
  • for filename in os.listdir(dir):
  • if filename.endswith(‘.csv’):
  • prefix, ext = os.path.splitext(filename)
  • label = labels[prefix[-1]] 
  • outfilename = os.path.join(‘formatted_data’, ‘{}.{}.json’.format(label, prefix)) 
  • with open(os.path.join(dir, filename)) as fp: 
  • values = [[float(i)] for i in fp.read().split(‘,’)] 
  • emptySignature = ”.join([‘0’] * 64)
  • data = { “
  • protected”: {
  • “ver”: “v1”, 
  • “alg”: “HS256”,
  • “iat”: time.time()
  • }, 
  • “signature”: emptySignature, 
  • “payload”: { 
  • “device_name”: “A0:C0:D3:00:43:11”,
  • “device_type”: “Raspberry_Pi_Pico”, 
  • “interval_ms”: 1, 
  • “sensors”: [
  • { “name”: “temperature”, “units”: “Cel” },
  • ],
  • “values”: values
  • }
  • # encode in JSON
  • encoded = json.dumps(data)
  • # sign message signature = hmac.new(bytes(HMAC_KEY, ‘utf-8’), msg = encoded.encode(‘utf-8’), digestmod = hashlib.sha256).hexdigest() # 
  • set the signature again in the message, and encode again data[‘signature’] = signature encoded = json.dumps(data, indent=4)
  • with open(outfilename, ‘w’) as fout: 
  • fout.write(encoded)

数据使用Edge Impulse CLI上传,需要先在Edge Impulse注册一个账户,并创建一个新项目来上传数据。下面的命令用于上传所有JSON文件,这些文件会自动分成训练和测试数据集。$ edge-impulse-uploader –category split *.json

上传的数据可以在Edge Impulse Studio查看。

训练数据是以1 ms为间隔的时间序列,但通过设置窗口大小768 ms(等于32×24=768热读数),它被用作单个数据实例。由于这不是一个时间序列数据,我们将使用原始数据块(无需预处理),直接反馈到神经网络块。下面是训练输出。因为没有很多的实例样本数据作为支撑,所以准确率只能达到80%,但是之后通过大量的实例训练数据集可以进一步提高。

04 硬件设置

Pi Pico通过I2C协议与MLX90640热像仪连接,通过SPI协议连接TFT显示器。TFT显示屏用于演示。红色LED灯连接到树莓派Pico的GPIO引脚3上。

Raspberry Pi Pico —– MLX90640热感相机

GP8 —————— SDA

GP9 —————— SCL

3V3(OUT) —————– 5V/3V3

GND. —————— GND

Raspberry Pi Pico —— TFT Display

GP14 —————— MISO

GP13 —————— CS

GP6 —————— SCK

GP7 —————– MOSI

3V3(OUT) —————– 5V

GND. —————— GND

GP15 —————– DC

GP14 —————– RST

05 Edge Impluse移植

只要根据其他平台可用的移植代码,创建一个移植代码文件,就可以在Edge Impulse SDK中加入对Raspberry Pico硬件的支持。以下是代码片段。(在写这篇文章的时候,Edge Impulse还没有正式支持Raspberry Pi Pico,但是相信在不久的将来会支持它的。)#include “ei_classifier_porting.h”
#include “pico/stdlib.h”
#define EI_WEAK_FN __attribute__((weak))
EI_WEAK_FN EI_IMPULSE_ERROR ei_run_impulse_check_canceled() {   
return EI_IMPULSE_OK;
}
EI_WEAK_FN EI_IMPULSE_ERROR ei_sleep(int32_t time_ms) {   
sleep_ms(time_ms);   
return EI_IMPULSE_OK;
}
uint64_t ei_read_timer_ms() {   
return to_ms_since_boot(get_absolute_time());}
uint64_t ei_read_timer_us() {   
return to_us_since_boot(get_absolute_time());} 

06 在Pi Pico上进行模型分类

复制下面代码:$ git clone  https://github.com/metanav/pico_person_detection_thermal.git$ cd pico_person_detection_thermal$ mkdir build$ cd build$ cmake ..$ make -j4

可以通过下面的步骤将生成的pico_person_detection_thermal.uf2二进制文件烧录到Raspberry Pi Pico上。1. 按住BOOTSEL按钮,将Raspberry Pi Pico插入电脑的USB接口,就会显示一个名为RPI-RP2的大容量存储设备。2. 将pico_person_detection_thermal.uf2二进制文件拖放到RPI-RP2上。烧录二进制文件后,Raspberry Pi Pico将重新启动,开始执行检测。

最终如上面演示视频所示,就可以看到,当有一个人出现时,摄像头检测到数据,随后树莓派Pico分析出是人,LED灯亮起。

用Edge Impulse实现MCU机器学习

将AI应用带到边缘终端设备(智能手机、可穿戴、汽车和物联网设备等)可以降低功耗,并减少数据中心资源的负载,其中在MCU上实现机器学习是这种愿景中最为活跃的领域之一,tinyML是一个致力于该领域的新的研究方向。本文讲述了使用Edge Impulse训练验证模型、模型转换、生成代码并部署的过程。Edge Impulse是一个在边缘设备上进行机器学习的在线开发平台,正在获得嵌入式系统产业界的广泛支持。

业界对机器学习 的兴趣近来大增,已经有许多云应用帮助我们进行机器学习的开发。但是,如果应用缺乏互联网连接,需要处理敏感数据,或者要求低延迟,在小型微控制器上运行机器学习会更为合理。本文通过一个样例项目演示使用Edge Impulse在小型、低功耗、低成本微控制器上进行机器学习的开发。

在应用端运行机器学习(ML)算法被称为边缘计算, 比如在工业园区的一个厂房内。在工业4.0和物联网中通过边缘计算使用ML意味着数据不会离开现场,基于ML的决策也可以被快速采用。模型的训练需要大量的计算,但是我们可以在小型、高性价比的微控制器上运行这些计算。基于非对称的ML的大量研究是tinyML基金会的成立的前奏。在嵌入式设备上运行机器学习模型的主要原因有三个:

•本地处理:避免传输传感器收集的数据。不需要互联网连接的话,设备部署的限制就会更少。

•低能耗:微控制器的能耗非常低。一个电池驱动的微控制器可以持续运行图像辨识算法一年。

•成本和部署:微控制器普适而且低成本,方便ML模型的部署。通过简单的软件升级,它们可以很快部署新的或者升级后的模型,而不需要替换硬件。

tinyML依然是一个比较新的研究方向,但是其应用非常广泛,包括农业、医疗和预测性维护等。

Edge Impluse

创建账户并登录之后,你就可以创建你的第一个tinyML项目了,如图1所示,SDK的界面简洁、直观。

图1 Edge Impulse SDK仪表盘

登录之后,仪表盘(Dashboard)显示项目的概况,以及如何启动你的第一个项目,或者继续一个现有项目的指南。界面左侧,在仪表盘下方是其他的主菜单选项,它们的顺序反映了开发的不同阶段,比如设备(Devices)页显示已连接的设备列表,数据获取(Data acquisition)则显示已经收集好的测试和训练数据。Impulse设计(Impulse design)创建一个Impulse,Impulse是一个接收原始数据、运用信号处理提取特性和通过学习块对新数据进行分类的过程。

连接设备时,需要参照仪表盘画面中间的指示,也可以前往设备栏点击连接新设备(Connect a new device)。开发环境支持下列设备:

•ST IoT Discovery Kit:即B-L745E-IOT01A,开发板上搭载使用Cortex-M4处理器的微控制器、MEMS动作传感器、麦克风和WiFi。

•Arduino Nano 33 BLE Sense:一个小尺寸的开发板,上面搭载基于Cortex-M4的微控制器、动作传感器、麦克风和BLE。

•AI ECM3532 Eta Compute Sensor:一个小尺寸的开发板,上面的TENSAI ECM3532 SoC搭载基于Cortex-M3的微控制器和一个单独的CoolFlux DSP用于机器学习的加速。开发板上有两个麦克风,一个6轴加速度计/陀螺仪和一个气压/温度传感器。ECM3532 SoC支持连续电压频率缩放,这允许系统在运行时通过缩放时钟频率和电压调整到最佳的电源效率,从而支持超低功耗机器学习。

•智能手机:Edge Impulse支持能够运行现代浏览器的任何智能手机,过程和方法和其他设备一样。最终,任何数据/模型都可以部署到嵌入式设备上。

图2 设备页显示已连接的设备

收集数据

首先,需要收集用于训练机器学习模型的音频数据。为了检测到水从水龙头流出的声音,我们需要收集一些流水的声音,以及典型的背景噪声(没有流水)的声音样本,这样模型就能够学习两者间的区别。这两类样本代表着我们模型中的两个类型:背景噪声和水龙头开启。在SDK的数据获取(Data acquisition)页可以收集设备传感器数据,这里是存储原始数据的地方。如果设备已经连接到远程管理API,就可以从数据获取页开始新的数据采样。

现在让我们先收录一段水龙头没有打开时的背景噪声,在收录新数据(Record new data)部分选择数据,设置标签(Label)为噪声,定义样本长度(Sample length)为1000,传感器(Sensor)选择内建麦克风。这意味着我们将收录一秒的声音,并将其标记为噪声,标签之后还可以再修改。点击开始采样(Start sampling),设备会录音一秒,并将数据传输到Edge Impulse。数据载入之后,已收集的数据(Collected data)下会出现新的一行记录,可以在界面上分析信号波形或者重播音频(见图3)。

图3 数据收集页收录和回放音频数据的部分

构建数据集

接下来,开始创建一个数据集。对于一个比较简单的音频分类模型,我们应该收集大约10分钟的数据。两个类型的样本应该基本均衡,所以我们需要收集:五分钟的背景噪声,标记为“噪声”;五分钟水龙头开启时的声音,标记为“水龙头”。

在真实世界中,我们感兴趣的声音往往会和其他声音混杂在一起,比如水龙头的流水声往往会伴随着洗碗的声音或者厨房的交谈声,背景噪声还可能有电视、小孩玩耍或者车辆从附近经过的声音。训练用的数据必须包含这些实际环境的声音,如果模型没有接触到它们,准确度会降低。在本文中将收录下面的样本:

•背景噪声:

o没有其他声音:两分钟

o同时有电视/音乐的声音:一分钟

o同时有偶尔的讲话/谈话:一分钟

o同时有做家务的声音:一分钟

•水龙头开启的声音:

o水龙头开启流水的声音:一分钟

o另一个不同的水龙头开启流水的声音:一分钟

o同时有电视/音乐的声音:一分钟

o同时有偶尔的聊天/对话:一分钟

o同时有做家务的声音:一分钟

即使无法取得全部的样本,也不必担心。我们的目标是每个分类都有五分钟的真实世界数据,在具有代表性的数据集上训练出的模型会更加准确有效。无法保证模型能准确分辨数据集以外的声音,所以我们必须尽可能地贴近真实世界,在数据集中包括多种声音。另一个选项是从Edge Impulse下载现成的十分钟样本 ,解压到本地后,在数据获取页点击上传数据(Upload data)图标(见图4),然后上传下载的文件,并添加标签。

图4 数据获取页,用于上传预先准备好的数据集

一次性可以收录的音频长度取决于特定硬件的存储大小,ST B-L745E-IOT01A板的存储容量允许一次性录音60秒,Arduino Nano 33 BLE Sense则只能录音16秒。录音60秒意味着需要将样本长度设置为60 000。从开发板上传输数据往往很慢,在Edge Impulse中采集60秒的样本大约需要7分钟。取得需要的10分钟数据后,就可以开始设计Impulse了。

设计Impulse

Impulse读取原始数据,将其分割为多个更小的窗口,然后通过信号处理块提取特征,通过学习块分类新的数据。信号处理块的作用是简化原始数据的处理,针对同样的输入同一个信号处理块总会返回一致的数值,因此学习块可从之前的经验中学习。在本文使用MFCC信号处理块,MFCC指梅尔频率倒谱系数[ ],这听上去很复杂,实际上就是从声音数据中移除大量的冗余信息。接下来,我们会将简化后的音频数据送到一个神经网络块(学习块)中,学习块将会学习如何区分两个音频类别(水龙头开启和噪声)。现在,打开创建Impulse(Create impulse)页面,你会看到原始数据(Raw data)部分。

同之前提过的一样,Edge Impulse在训练时将样本分割为小的窗口,然后将数据发送到机器学习模型中。窗口大小(Window size)参数控制每个数据段的长度(单位毫秒),一秒长的音频样本足够确定水龙头是否开启,所以设置为1000毫秒。每一个原始样本被分为多个窗口,窗口间距(Window increase)的大小决定下一个窗口和上一个窗口的间距,1000毫秒的窗口间距意味着每个窗口在上一个窗口开始的一秒后开始。

如果窗口间距的数值小于窗口大小,则可创建互相重叠的窗口。虽然窗口间会包括一部分相似的数据,每一个样本依然是独特的。互相重叠的窗口帮助我们高效地利用训练数据,比如1000毫秒的窗口大小和100毫秒的窗口间距意味着可以从两秒的数据中提取十个独特的窗口。本文中设置窗口大小为1000毫秒,窗口间距为300毫秒。点击添加处理块(Add a processing block),选择MFCC块,然后点击添加学习块(Add a learning block),选择Keras神经网络块(Neural Network – Keras),最后点击保存。创建Impulse的页面如图5所示。

图5 创建Impulse

MFCC块配置

目前已经凑齐了Impulse所需要的基本组成模块,现在可以单独配置每个部分了。在左侧的导航菜单中点击MFCC标签进入块配置页,界面上可以预览数据将如何被转换。在右侧可以看到一个频谱图上显示了MFCC处理音频输入后的输出结果。MFCC块将一个音频样本转换为一个数据表格,每一行是一个频率范围,每一列是本时间区段内频率范围内声音的强度。频谱图用颜色填充每个单元格,颜色的深浅表示振幅的高低。图6中对比了噪声和水龙头声音的频谱图。

图6 噪声(上)和水龙头声音(下)的频谱图

我们的双眼很难分辨出两张图的区别,但对于一个神经网络而言,它们间的差别足够用来学习两个类别的不同。在参数(Parameter)框中可以配置MFCC块,Edge Impulse的默认数值适用于多数情形,这里不做修改。MFCC块产生的频谱图会被发送到神经网络中,神经网络的特性意味着它特别适合学习此类列表数据背后的模式。

在训练神经网络之前,需要从采集的所有音频窗口中产生MFCC特征。点击页面上方的产生特征(Generate feature),然后点击绿色的同名按钮,分析十分钟的样本需要几分钟的时间,这一过程结束后,特征浏览器(Features explorer)会以可视化的形式显示数据集,你可以检查不同类型间的区别是否明显,并查找错误的数据标签。为了能在三维空间内显示所有的特性,这里用到了降维手段。

神经网络配置

神经网络借鉴人脑的工作方式,能够学习辨识训练数据中的模式。我们训练的神经网络从MFCC中取得数据,然后决定输入数据属于噪声类别还是水龙头类别。点击左侧菜单的神经网络分类器(NN Classifier)进入块配置窗口。一个神经网络由多层虚拟的神经元组成,在页面的左侧可以看到当前的状态。输入数据(来自MFCC的频谱图)首先进入第一层神经元,这些神经元有着各自独特的内部状态,会对输入进行过滤和转换。第一层神经元的输出会被送到第二层神经元,以此类推,神经网络会一点点转变原始输入,最终变成完全不同的输出。在本例中,频谱图经过4个中间层后变成两个数字,分别是输入数据代表噪声和水龙头开启的可能性。

在训练中,为了让神经网络能够正确地转换输入并输出我们想要的结果,每个神经元的内部状态都会逐渐转变。当输入一个样本时,根据网络输出结果和正确的响应(标签)间的距离,神经元的内部状态会被调整,这样下次网络给出正确响应的可能性就会更大。重复这一过程几千次,就会得到经过训练的网络。

对于神经网络而言,神经元层的安排被称为“结构”,不同的结构适用于不同的任务。虽然Edge Impulse中默认的神经网络结构很适合当前的项目,但也可以定义你自己的结构。在开始训练模型前,需要更改配置中的一些数值。首先将训练周期数(Number of training cycles)设为300,这意味着整个数据集在训练中会被处理300次。如果周期数太少,网络无法从训练数据中充分学习,但是如果周期数太多,网络可能会过度切合训练数据,无法正确处理新数据,这一问题被称为“过拟合”。

接下来,将最低置信度(Minimum confidence rating)设为0.7,这意味着当神经网络作出预测时,除非声音是水龙头流水声的概率为0.7以上(比如0.8),Edge Impulse将会忽略这一预测。现在我们可以点击开始训练(Start training),训练将会花上几分钟时间,结束后会在页面下方看到上次训练表现面板(见图7)。

图7 训练后网络的表现

虽然完成了Edge Impulse中神经网络的训练,但是结果中这些数字都意味着什么?在训练开始前,20%的数据被预设为验证数据,它们被用来验证模型的性能,而不是用做训练数据。上次训练表现(Last training performance)面板上显示验证的结果,从而提供关于模型性能的信息,你看到的数字可能会和这里的不同。准确度(Accuracy)指被正确分类的音频样本的百分比,数字越高越好,不过一般不太可能接近100%,极高的准确度往往也意味着过拟合。就许多应用而言,高于80%的准确度已经很好了。面板中央的混淆矩阵 显示正确和错误分类的数目。

分类新的数据

虽然上一步中的性能数据说明模型在训练数据上的表现很好,但在部署前用新数据测试它依然是非常重要的,这能帮助我们确认模型没有过拟合。Edge Impulse内建了一些测试工具,帮助从设备上实时抓取数据并立即进行分类。点击左侧菜单上的实时分类(Live classification)按钮,你的设备应该出现在分类新数据(Classify new data)面板上,点击开始采样(Start sampling)将会收集5秒的背景噪声数据。

测试模型

通过实时分类(Live classification)标签页可以快速测试你的模型,了解模型的行为。不过,如果想要确保你的模型的正确性,需要更加严格地测试你的模型。模型测试(Model testing)标签页正是为此而存在的。理想状况下,你的测试数据集大小应该至少是训练数据集的25%,假设训练数据是10分钟,测试数据至少需要2分30秒。此外,还需要确保测试数据能够反映大量的真实情形,这样能够以不同的输入测试模型的性能。

比如说,收集若干不同水龙头的声音是一个很好的主意,可以从数据获取(Data acquisition)标签页管理你的测试数据。打开标签页,点击上方的测试数据(Test data),使用上传(Upload)功能导入数据,过程同之前上传训练数据一样。确保数据的标签是正确的,结束后返回模型测试(Model testing)标签页,选择全部样本,然后点击分类选中的数据(Classify selected)。

图8是分类的结果,面板显示模型的准确率是73.42%。针对每个样本,面板上会显示其准确率,比如其中一个样本的分类准确度为67%。有很多误分类的样本非常宝贵,这样的样本中有许多模型目前不拟合的音频类型,通常需要将此类样本加入到训练数据中。

图8 测试数据分类的结果

在硬件设备上部署模型

设计、训练并验证了我们的impulse之后,就可以在硬件设备上部署了,这意味着模型可以在没有互联网的情况下以最小的延迟和最低的功耗运行。Edge Impulse可以将整个impulse包装为一个C++代码库以供编程使用,包括MFCC算法、神经网络和分类代码。点击菜单中的部署(Deployment)开始模型的导出过程,接下来在构建固件(Build firmware)下选择正确的开发选项,然后点击构建(Build),就会针对特定的开发板将impulse输出为二进制可执行文件。构建过程完成后程序会提供二进制文件下载,将文件保存到本地。点击构建(Build)按钮时,程序会弹出窗口、提供关于部署的说明,指导你在构建后进行测试。可以在命令行上运行如下命令以打开连接硬件固件的串行接口:$ edge-impulse-run-impulse

这一命令会打开麦克风收录声音,在数据上运行MFCC代码,并对产生的频谱图进行分类。

结 语

在微控制器上运行机器学习是一个比较新的领域,对于不熟悉人工智能的开发者而言很难上手。Edge Impulse简化了数据的收集和分析、神经网络的训练和构建,以及在微控制器上部署的过程。这类模型有着诸多应用,从监控工业机械到辨识语音命令都可以适用。Edge Impulse易于使用,界面直观,而且免费,这意味着可以立即开始探索在嵌入式设备上运行tinyML。(本文首先在Elettronica Open Source 上以意大利文发表。)

相关参考链接:

https://www.expert.ai/blog/machine-learning-definition/.

https://www.tinyml.org/.

https://www.tinyml.org/.

https://cdn.edgeimpulse.com/datasets/faucet.zip.

https://www.tinyml.org/.

https://www.dataschool.io/simple-guide-to-confusion-matrix-terminology/.

https://it.emcelettronica.com/.